Pages

Saturday, April 30, 2016

Mondrian Creatures (2015)

Mondrian can be a little boring but this project always puts a fun twist on him that keeps students engaged...check out my original lesson here with links to where I got the original idea. I also did another awesome Mondrian project with my old 5th graders that you can check out here.

I Can tell you something about the artist Piet Mondrian
I Can name the primary colors
I Can create a creature out of a Mondrian inspired painting

Day 1: Intro to Mondrian including using the awesome video below....


After filling out their artist page they set up their papers so they were ready to paint next class. They each had a 9x12 piece of paper and had to draw at least 3 vertical and horizontal lines that touched each side. They also added more lines that didn't go all the way across to make for a more interesting composition. I did this with them using my document camera and we really focused on using our ruler correctly to get straight lines.

Day 2: Another AWESOME video. Review of primary colors. Then painting the primaries.

This video is probably their favorite.

For painting the primaries, I had each individual primary color of tempera paint on 2 tables and students moved to the color they needed to use. (A simple easy way to incorporate movement!)

Day 3: ANOTHER awesome video. Painting the black lines and practicing their creature.


For painting the black lines, I had multiple widths of flat brushes for them to use for more line variety. When they finished they got a 9x12 scratch paper to practice drawing whatever they were going to turn their painting into. Students that were absent somewhere in this process used a thick sharpie to draw their black lines instead of painting, this really helped to catch them up.

Day 4: ONE MORE awesome video. Creating the creature day one.

This one is MY favorite.

On the back of their paintings they drew their creature as big as possible and cut it out. I had all colored scraps, silver paper, string, and sharpies for them to add more details.

Day 5: They were bummed I didn't have one more video. A second workday to create their creature, fill out their second part of their artist page, and do the mondrian extension activity.


Anyone else have a fun project they do with Mondrian besides just the classic painting like him?

Wednesday, April 13, 2016

Big! Vertical! Snowmen! (2015)

Great news! This is the last winter project I have to share with you. Hopefully that actually means we will finally get spring around here! I created these with Kindergarten and 1st but it would be a great way to explore using paper in a 3 dimensional way with slightly older kids.


I have done this project previously and written about it here and here. But I changed it up this year with materials and adding another concept.

I Can create a vertical snowman that takes up most of my paper.
I Can add something 3D to my snowman.
I Can tell you what 3D means.

Day 1: Kicked off with one of my favorite books called Snowmen All Year (it comes from a series of other beautifully illustrated snowmen books).


Then we got into the same discussion as usual with this project about vertical vs horizontal. To reinforce, I had a variety of images and flipped through them and they had to show me with their arm if they thought the subject of the image was vertical or horizontal. This was really fun and silly. Especially because I tried to find some more creative images like this one...

After my demo video they were ready to work. They drew the snowman with a white crayon first then filled it in with white tempera.
Keep in mind these are pretty big each one is 1/3 of a piece of poster board....

Day 2: Instead of a story we watched one of my FAVORITE animations and talked about what the animation was trying to teach us...

Then we dived into talking about 2D vs 3D. Both the concept of vertical vs horizontal and 2D vs 3D is easy for the littles to understand but remembering the vocabulary always seems to stump them. After my video demo and them watching me make a cup for my snowmen only like 100 times they got to work!


Day 3: A little more work time was needed for a good chunk of students but not an entire class.

I did a little experimenting this time with giving some extra supplies like oil pastels and funky scissors to some classes but not all. If I do this project again I think I will give more choice in materials and allow for any combination of them. 


Monday, April 11, 2016

Texture Polar Bears (2015)

3rd grade took a break this winter from their official world travels, to travel to the North Pole to make these texture polar bears...inspiration came from Pinterest via this post.

I Can tell you the different between visual and real texture.
I Can create a polar bear with multiple textures.

Day 1: I did a fun project reveal using this video...
We kicked off the creating with a demo on creating the polar bear with a sponge. They went right for it without drawing first. Then I had an awesome station set up with protective paper on the walls and a cart and they took a spray bottle with watered down paint and went nuts to make the rest of the background.

 Day 2: This is when we really dived in and talked about texture. I had a variety of examples of real versus imagined and flipped through images and held objects and they had to shout out what kind of texture they saw. After, we explored how we were going to incorporate texture into the polar bears using a variety of materials. Before they started to add things, they drew faces with black crayon and I walked them through creating paper patterns using newsprint. This was the best strategy I had for less waste of felt and fabric. They set a piece of newsprint over their polar bear so they could see through it, and drew what they wanted to add. Those pieces got cut out and were traced on the felt so they had the perfect sizes. It was also a great way to talk about the process of fashion design and clothing making.
Day 3: Reviewed texture and the continued to add to their polar bears. They also added snowflakes with either glitter and glue or paper snowflakes.
I am in love with all the different personalities of the polar bears. Thinking of mixing it up next time with a variety of animals to choose from...

Saturday, April 9, 2016

Adaptive Art Winter Art!

Well we got snow yesterday in Wisconsin, so precipitation speaking it is still winter. If it makes you feel better we actually made these throughout December and January....

 My high school adaptive art students vary quite a bit in ability and all ended up being successful with these projects...

Trees: This project I did with my Kinders and 1st graders and you can read about it here.

Mittens: Using a tracer they drew the mittens and then cut tissue paper and collaged it on with watered down glue. The backgrounds were painted paper with a finishing touch of white sponge painting.
They LOVED making these snowmen. We made the balls with newspaper and masking tape then attached popsicle sticks on the bottoms so they wouldn't topple over. For paper mache we used newspaper strips and only the best supply ever for paper mache...Elmer's Paper Mache Art Paste!
Elmer's Non-Toxic Washable Art Paste, 2 oz
I only see these students for about 40 mins 3 times a week so we took 2 classes for paper mache, one for painting, and part of one for making them into real snowmen with buttons and other embellishments.

Monday, April 4, 2016

Winter Forests with K & 1 (2015)

With winter hopefully over here in Wisconsin (you just never know!) it is about time I share the winter inspired projects I did with my kiddos...

This project was inspired by this post via pinterest which was pretty minimal so I look things into my own hands!

I Can statement: I can tell you what a landscape is. I can show trees up close and far away using size and placement.

Day 1: Texture review, creating painted paper

We kicked off the day reading Snow Party by Harriet Ziefert and then reviewed what texture was. I also started to introduce landscapes.


After our book and our chat they got busy making 12x18 pieces of green painted paper with lots of tree textures.

Day 2: Talking about landscapes, Painting the background

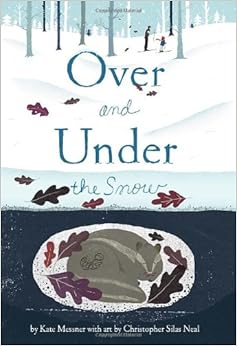
We read another BEAUTIFUL book called Over and Under the Snow by Kate Messner and then talked more about landscapes and what made something a landscape. Then they started creating a background for their forest.


I had them use a white crayon to draw their horizon line and then they sponge painted the snow with white tempera paint on a dark blue piece of 12x18 construction paper. When they finished the ground, I had a station set up to splatter paint the snow in the sky. If they were goofing around or getting paint on their faces on purpose during the splatter painting they were cut off. I used watered down tempera and big #12 watercolor brushes for the splatter. I use the technique where you get the brush nice and sloppy wet and hold it with one hand and then tap it with your other hand over the paper.

Day 3: Learning about size and placement, activity, and adding trees!

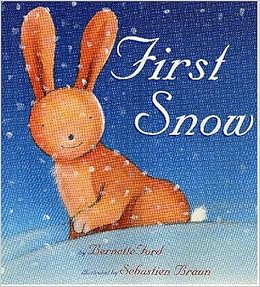
We read the book First Snow by Bernette Ford.


Then using the book I asked questions about why the trees were big or small in the illustrations and they gave me examples of where they see the same concept in their lives. To better understand the concept, and prepare them to add their trees to their artwork, I created a document in SMART Notebook for my SMART Board with a background very much like their paintings and variety of sized trees. They look turns coming up and placing the trees from biggest in the front to smallest on the top of the hill/horizon line. 


I 100% feel this activity helped solidify the concept and allowed for so many to be successful.

They got back their painted paper cut in 1/2 (so I have extra!) to create their trees from. They had to draw at least 3 tree triangles that were different sizes on the back. Then, they cut them out and glued them to their backgrounds to be biggest closest to smallest furthest away. They were also given strips of brown to be their tree trunks. It was fun to challenge them to make the biggest and smallest tree in their class! 

I also did this project with my Adaptive Art high schools students and it was really successful with them too!

Saturday, April 2, 2016

Valentine's Art (2015)

Looks like I forgot to share these you know like almost 2 months ago.... better late than never!

I recently decided that I really like the way I do "holiday" project days. I will probably keep up with it until it doesn't work anymore.... I come up with, or borrow from the internet, a 1 Day project for K & 1st that they can take with. For 2nd-4th I pick/find a variety of short things they can bounce around to whatever piques their interest that they can also that with that day. The only rule for the 2nd-4th being no "free art". Here is a look at some of what they did on Valentine's Day 2015.

K & 1: We read a favorite book of mine for Valentine's Day called My Heart is Like a Zoo by Michael Hall. All of the pictures of animals are created using hearts! After the book I showed them pictures from previous years of artwork created by students using only hearts and then gave them a big pile of hearts I cut out to create from.


2-4th: Had that same option of creating artwork using hearts or they could do a few other things. I had paper quilling like at Christmas, watercolor pencils, lego challenges, tracing their hands to make a heart valentine, and good ol' fashion valentine making...

I really enjoy the variety that comes out of days like this and ALMOST makes me consider a semi-choice based classroom....

Thursday, March 31, 2016

3rd Grade Australian Aboriginal Dot Art (2015)

3rd Grade's Elementary Art curriculum of world cultures allowed me to "travel" with them to Australia to learn about the country and create some Australian Aboriginal Dot Art!


This project came from the ever brilliant Mrs. Nguyen over at her blog.

I Can statements: I Can tell you something about Australia. I Can create an artwork in the style of Aboriginal Dot Art.

As i've mentioned in other 3rd grade "travels" my goal is to give my students the biggest picture of a culture or country as I can in a one project time frame. I came up with framing my lesson in a way that gives them small background knowledge and then connecting one of those background pieces to artmaking. To help my students track their new found knowledge, each time we "travel" to a new place I have them fill out a passport page. You can read more about this process from this post.

Day 1: Intro to Australia, passport, animal practice, and set up.

We started by looking at the Australian flag, looking at Australia on a map, and then 5 facts about Australia!

1. Australia has over 10,000 beaches. You could visit a new beach every day for 27 years
2. There are more kangaroos than people in Australia
3. There is a lake in Australia called Lake Hillier that is known for its pink color
4. The top 10 deadliest snakes can be found in Australia
5. Australian Aboriginals make artwork using dots to tell stories about their tribes and land.

Obviously the fact we dived into the most was about the Aboriginals. I was trying to get them to use textual clues to figure what Aboriginals meant and we finally got it! However, their favorite fact was probably the pink lake!

We watched part of this documentary from 37:02 to 40:23 as an introduction to the Aboriginal culture and their dot art.

Then the first part of their passports were filled out and it was time to start working. I provided them with the handout below and then they practiced different animals they wanted to create. When they had one down comfortably they drew it on a 6x9 piece of bright construction paper, cut it out, and glued it to a 9x12 piece of black construction paper.


Day 2: Starting the Dots!

Kicked off the day with another short video...


After the demo they got to work making dots like machines! Some students had to finish drawing and cutting their animals before creating dots. Each table had a pallette with a full set of colors and enough scratch art sticks for each color. They used the back flat end of the sticks to create the dots. We talked about using just the right amount of paint and how many dots were just enough before dipping again and what the best way to go about laying down dots was. The first workday everyone was really focused and into it....


Day 3 & 4: Workdays!

Started off each day with a little review about what we remembered from Australia and then they got to work. As time went on they started to lose motivation and focus but not finishing was not an option. I did allow friends to help (if they wanted help) once we got down to the last few minutes on the last workday.


 When they were finally done the last job was finishing their passport and turning in their project.


I am so proud of their perseverance and quality that came out of this and REALLY glad I didn't go bigger than 9x12. I am thinking next time that early finishers could do a really big group one!

Looking for feedback on two things....

Do you think it was okay that I "made" them finish and not quit?

Do you think it was okay that I allowed friends to help (if they wanted) at the end?