Pages

Showing posts with label 4th Grade. Show all posts

Monday, October 2, 2017

Building Prints

This was a project that I did with my 4th graders at the end of the year last year for something quick, fun, engaging and collaborative.

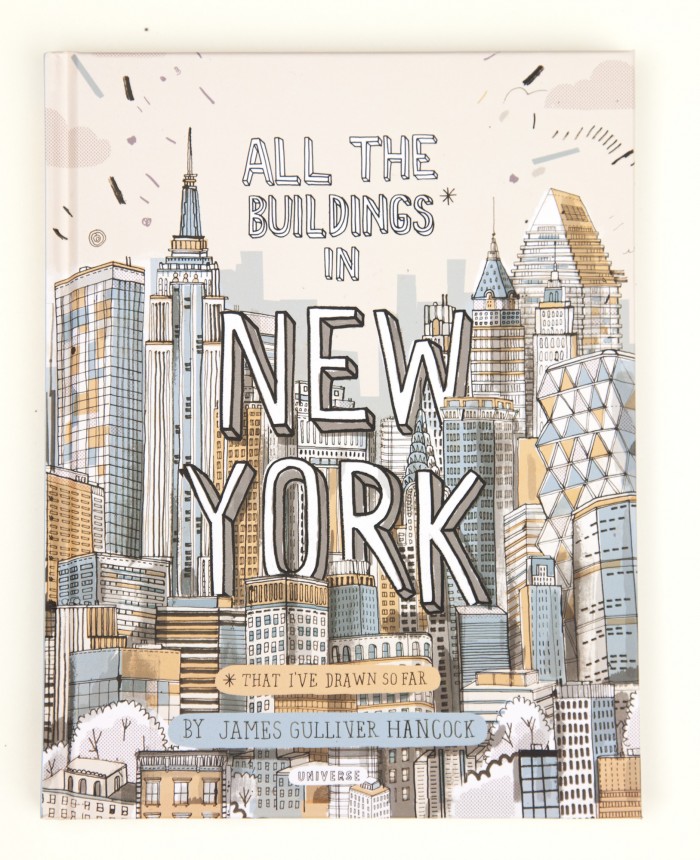
This project was inspired by contemporary illustrator James Gulliver Hancock and his book All The Buildings In New York that was lent to me by one of my Elementary Art team memebers. 

jgh_allthebuildings_book_7
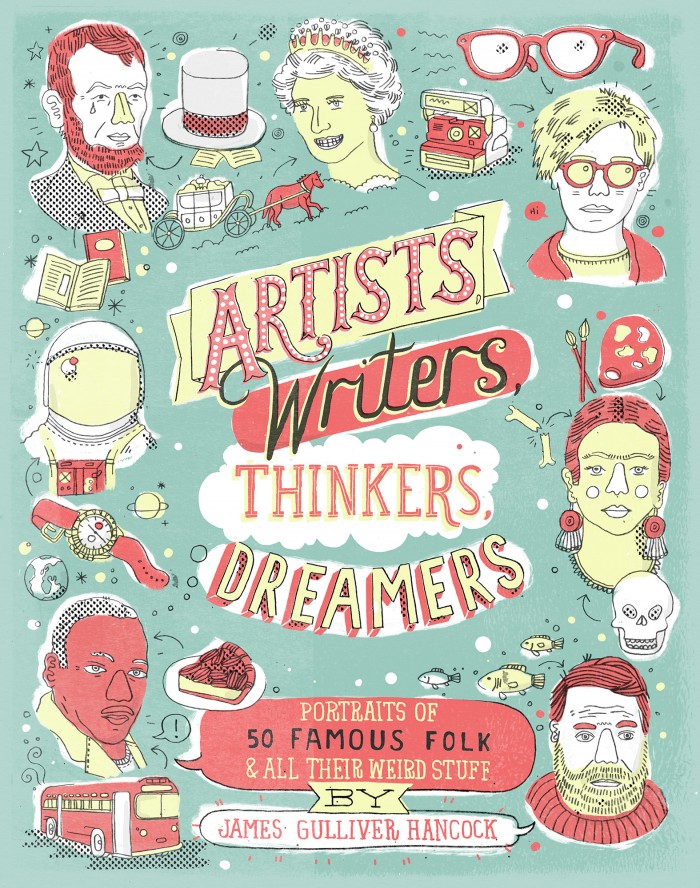
Take a minute to explore his website. He is incredibly talented and does a large variety of work. I scrolled through a bit of his work with students and they loved it. I ended up buying another book of his which isn't appropriate for young students but is seriously amazing called Artists, Writers, Thinkers, Dreamers: Portraits of 50 Famous Folk & All Their Weird Stuff and I fell in love with it. You can get both books on Amazon.
ArtistsWritersThinkers_CASE_1G.indd

So here is how the project went down, and it went fast and quick because it was their last 4 art classes of the year.
I Can illustrate a building and print it to be a part of a collaborative installation art work.
Day 1:
First we looked at crazy architecture with this video:
Then, looked at his website and listened to illustrator James Gulliver Hancock:

All the Buildings in Melbourne from James Gulliver Hancock on Vimeo.

They had to finish drawing a building that filled most of a 6X9 piece of paper, without too much detail (because it won't print), and had to remember to flip any words like a stamp. I encouraged drawing directly with pen like our inspiration but didn't require it.
IMG_1668.JPG
Day 2:
A quick demo of transferring to a printing plate that was cut the same size as their paper (6x9) and then they had the rest of the time to complete it so they could print next class. I just use the generic packs of foam printing sheets from School Specialty and cut them down to smaller sizes. We taped a hinge to keep drawings lined up when transferring. They traced once over/on the paper to get the initial lines then flipped up the paper and did it again to make it deeper with a dull pencil.
IMG_1680.JPG
Day 3:
Printing! A quick demo of printing from the plates and then they had to find a printing buddy to work with and to assist. I cut sheets of every color construction paper I had, black and white tempera paint, and brayers for students to use. They had to print until they had AT LEAST 3 good prints, but could keep printing the entire time if they wanted. 
File_000.jpeg
Day 4: 
We passed out prints, filled out the rubric and handed in the print that they wanted up in the the farewell 4th grade village and in artsonia. If they finished that, they could trade prints with friends and make mini villages. They took extra prints and mini villages with because it was the last day of art for most!


A lot of success across the board in each step so I will likely be doing some version of this again in the future!

Monday, January 2, 2017

2016 Yearbook Covers

Our school district has a tradition of our 4th grade students designing the yearbook cover for the district's joint elementary yearbook that includes our four elementary schools.

All 4th grade students create a cover and then myself and the other elementary art teachers send them up to the middle school to be selected by the middle school art teachers. One gets chosen for the overall cover, four get chosen for the back cover, and a few others get chosen for the start of each school inside the yearbook.
It is a VERY long process that has to be done at the start of the year because covers need to be completed by the end of November. We tried to shorten the time this year but somehow it still look 2 months! 
The bottom left was selected for the back cover.
I started with my students exploring old yearbooks and mapping out why they think the covers got selected. Then they used the sheet below to practice skills and generate ideas/sketches. The themes we selected for them to work from were "Kindness Begins with Me","Dare to Dream", and "Anything But Ordinary".


They conferenced with me after their sheet was done and created a rough draft without coloring, conferenced with me again, and then started on their finals. In the past coloring goes out the window in big areas so to help prevent that I had color sticks by crayola for them to use in large areas. If you haven't used color sticks they are essentially a naked colored pencil. No wood surrounding the color core.
 

These babies are a lot of work but when students reflected with our 3-2-1 sheet many were proud of the work they did and enjoyed the process and project.


Here is last years post and covers.

Sunday, August 14, 2016

Radial Paper Relief Sculptures (2015/16)

If you havn't seen Art with Mrs.Nguyens posts on these babies (this is just one of her many posts on it) then you have been seriously missing out. Her TpT lesson for these is worth every penny and worked perfectly for my 4th graders. I did change up the powerpoint a bit to fit my style but other than that I used all of her resources, including the video teaching the folds. 

I Can create a relief sculpture using paper that has radial symmetry.
I Can use color in an organized way.

Before you do anything to start this project, cut about a billion* pieces of 3x3 construction paper in all different colors. After cutting I divided up into ice cream buckets, one for each table.
*There is really no way to know how much of what colors they will use. I started with 4 pieces of 12x18 construction paper of every color that I had and cut more as they used them.

Day 1: Learning and practicing radial symmetry.
Using the awesome powerpoint by Mrs. Nguyen and modified by me, I introduced radial symmetry to my students and then we spent the rest of class with my buckets of "junk" making radial symmetry on big 24x24 sheets of paper. The paper has basic radial symmetry guidelines drawn on them and students work in table teams to create the most interesting radial symmetry.
My only warning with this is sometimes they get carried away with the "junk" and start getting in fights about what table has what and who can borrow and who can't. Squash it fast.

Day 2: Review radial symmetry and learn the folds. Talk about organized color.
After a review of radial symmetry I show them the handouts that teach the folds and we watch the video of learning the folds (both by Mrs. Nguyen) together. Then they grab one piece of 3x3 paper for each fold and go back to their seats. We watch the video again, pausing where needed to follow along making the folds. This process worked really well because those that got it right away kept going and those that didn't followed slowly with the video.

 After we finished all the folds they went nuts folding whatever they wanted to use for their project and put them in a big envelope with their name on it for next class. Students that had more difficulty with the folds met me at the carpet and we went through the video again (maybe 1 or 2 kiddos per class). A little ways through I brought them all back up front to talk about our I Can statement of using color in an organized way. They had a choice of either using color symmetrically or using patterns and balance with color. I showed a lot of examples from Mrs. Nguyen's powerpoint.

Day 2: Another review, folding the background.
We reviewed radial symmetry again by looking at a variety of pictures and they had to use plickers to tell me if the image had radial symmetry or not. Check out the video below to see how plickers works. Its seriously the best. AND FREE. AND students LOVE it.

 After that they grabbed the black paper (12x12 square) and we walked through the folds together as a class to get the folded guidelines for their paper relief sculptures.

At this point the workflow became different for different students. Some wanted to fold everything before gluing and some folded and glued at the same time. It didn't matter to me as long as I could see them making smart choices in their art.


I highly recommend using glue sponges for this project. It allowed for such clean and beautiful work. We used popsicle sticks to rub down the paper that was in a tight space if their fingers wouldn't fit.


Days 3-6: Workdays and extensions.
Give them a lot of time on these, it is so very worth it and hopefully they will love this project as much as mine did. Towards the end when some were finished and some weren't, I had two follow up activities they could do. Make a radial symmetry drawing out of their favorite things, or make a group radial symmetry paper relief sculpture on 24X24 paper.


Wednesday, June 22, 2016

Abstract Paintings with 4th Grade

I've been MIA for a few weeks taking a break from anything school/work related to enjoy the first few weeks of break, but now I'm back in action ready to share more projects from last year!

First up, these super fun abstract paintings I did with my 4th graders...

I Can Statements:
I Can talk about abstract art. I Can create an abstract artwork using my name. I can make shades and tints to paint monochromatically.

Day 1: Started this lesson in a really fun way with my students, I had them partner up and find a spot in the room and I put up an abstract painting or sculpture on the SMARTboard. I had given them a list of a variety things to talk/think about with their partner during this activity... "How does this make you feel?" "Do you see anything in this artwork or does it remind you of anything?" "Do you think this is art?"...and other questions that would spark the conversation. After a minute or two they changed partners and I switched the artwork. This went on for 15 minutes or so and then we came back together to talk about what we heard others say and what we thought. Eventually getting to the conclusion that we were looking at abstract art. I was also a participant in this activity with my partnering up with my students.


Because the 4th grade curriculum is centered on the 4th graders themselves, I wanted to find a way to connect back to that...ergo to set up their paintings they started by writing their names (and I don't just mean writing their names on the back to identify their work). They could write their first, middle, last or any combination of their name and they had to write it in a way that created a variety of interesting shapes and spaces that could be filled in with paint. I encouraged capital letters and stretching and rotating them to create the most interesting composition and then repeating the name over and over. Check out my demo video below (sorry no sound, I narrate live to my students).


Day 2: We reviewed abstract art and then started our discussion on value and monochromatic colors. My favorite part was showing them monochromatic photography and paintings. We got busy practicing by painting a strip of paper from light to dark of their chosen color. Once I saw the strip they were free to get busy on their final artwork. I encouraged them to mix in the best way for them (I love to do my mixing right on my paper) and made sure they knew they would be in charge of cleaning their paint pallette (which we almost never use because i'm a big fan of the disposable route).

Day 3 & 4: A lot more paint and painting.


Day 5: When a good chunk of students were done painting we did my favorite part. CUTTING!!!!!! There wasn't really any guidelines for this part of the project other than changing the edge and using every little piece of their painting, no tossing scraps! The size of the pieces that they cut was up to them. For this project, I introduced them to glue sponges which really kept these looking incredible and not full of loads and loads of glue. My helpful hint was really really really holding the pieces down after gluing. I even encouraged sitting on their artwork just to make sure they were nice and flat ;) I had them keep the monochromatic theme for their background paper but I think complementary colors for their background would be a great extra pop to these next time around.


Mixing paint always keeps students engaged and I chalked this one up to a really successful project especially during our critique where they could barely sit still and keep from coming up and pointing out all the things they "saw" in each other's paintings. One more bonus--if they get behind they can skip the cutting up part!

Monday, May 30, 2016

End of the Year Paper Sculptures

The last few weeks of the school year are in full swing. All 400ish portfolios are handed back which means one day-no grade-"Take it with you please!"-projects are happening all over the place.


THIS is my favorite. Any class that was caught up and had a day or so left with me are making these wicked awesome paper sculptures. HUGE thanks to the ever brilliant shine brite zamorano for the inspiration via this post from pinterest.

These were done with a variety of K-4 classes and were incredibly open ended. I made the video below (Sorry I don't do sound!) to show them some of the basics and just "required" them to do two pieces of paper as the base. The two paper rule was to give it a little weight so they wouldn't lift when they started gluing. Everything else they did was up to them. Most students went abstract but I had a few do playgrounds, roller coasters, houses, and masks.


The only two negatives were the prep of cutting all the paper and having K & 1-ers wanting to do the cylinder and having difficulty gluing it down with enough glue to keep it on. There was a lot of end of the world tears when that happened.


My FAVORITE thing that happened was no one asking to do free art in my 3 & 4 classes because they were so completely engaged (which says a lot for the last 3 weeks of school).


HIGHLY recommend this as an end of the year project, if you have any paper left that is!

Monday, January 4, 2016

4th Grade Yearbook Covers (2015)

When I started in my new district this year the big THANG in the Elementary Art program is 4th graders designing the covers for the yearbook. We do a joint elementary yearbook of all the elementary buildings so it is a pretty big deal. It was also a big and long undertaking but they really did a great job! The middle school art teachers choose the winning covers. One is chosen for the main or back cover and three for the inside.

The bottom right and top left won two of the inside cover spots!
We talk a lot about good design, fonts, best coloring, and creating sketches and drafts. Here are some of the sheets we used for this process, including a rubric when they were finished.


In the past coloring goes out the window in big areas so to help prevent that I had color sticks by crayola for them to use in large areas. If you haven't used color sticks they are essentially a naked colored pencil. No wood surrounding the color core. 

When they were finished everything had to be colored and have a sharpie outline.

Bottom left won a cover spot! 
I think the only change I'll make next year is to do a color test/skill check differently, maybe a coloring sheet!?


Tuesday, December 29, 2015

Holiday Art 2015

Wanted to share what my students did the few days leading up to break....
 I really like the way I managed my holiday projects this year. The last day I saw each class before break (unless they were really behind on projects) we did holiday art. Kindergarten and 1st grade did the trees and I set up 2nd through 4th so they could choose from a variety of projects.

I have been doing video demos of projects this year where I record myself ahead of time.... I didn't want to take the time to do that for these projects, butI did take pictures and showed them a step-by-step slideshow. K and 1st just saw the tree and 2nd-4th got to see the step-by-steps for each project so they could decide which ones they wanted to do. I have a really large room so it was was easy to set up each project in different sections of the room.

The tree inspiration came from this image via pinterest. I pre-cut the strips and then hid the scissors so they had to approach it like a puzzle. The bottom right was done by a 1st grade kiddo with special needs and I about cried when I saw how awesome his turned out! This was the project for K and 1st but 2nd-4th could do it as one of their choices.

The name in lights project was the definite favorite. This one also took the longest depending on how many lights they drew. Everything in black is draw with sharpie and then the lights in washable markers. A little water with a paint brush over the top of the markers and it looks like they are glowing. Too much water was an issue for a lot of kiddos who didn't seem to hear the warning about too much water and the water dripped all over the page and took the marker with it. I cannot for the life of me find the Pin on pinterest that inspired this project.

 Paper quilling is seriously one of my favorite forms of art. I wish I would have taken more pictures of these! I started with them using a heavier paper (80lb) and the paper was not holding great, so I switched to a 50lb and the results were much better. The students that chose to do this were VERY into it.

I did a little quilling of my own during one of my really well behaved classes and turned it into an ornament!

I had a group of 3rd grade boys that asked to do legos for a majority of the time and I agreed only if they built whatever I challenged them to build. This was the Santa challenge. I am blown away what kids can do with legos. Anyone who says legos don't belong in an art room needs to reconsider!

These are the ornaments that the other two elementary art teachers that I am SO blessed to work with made for me this year!

And my hand-made ornament for family and friends this year!

Hope you have time to get a little creative yourselves this break, even if it's a new adult coloring book you got as a gift! I got 3!