Pages

Showing posts with label Color Mixing. Show all posts

Sunday, February 5, 2017

Color Mixing Cookies

 Back in December I posted about how I was incorporating more play into my art room especially with K and 1 students, you can read it here.  This lesson with K&1 was another where I loaded on the play. So much so, my students thought I was crazy.
I Can mix primary colors to get secondary colors.
I Can identify primary colors.

Day 1: Baking Cookies
If you aren't ready to make a fool out of yourself then you might not be ready for this. Let me set the stage...Before my students came in, I took flour I brought from home and put smudges of it all over me. As they walked in the room, I had a picture of a kitchen on the SMART board and had an empty mixing bowl that I was stirring with a spatula. Behind me "in my kitchen", a toy oven borrowed from a Kindergarten room. We didn't start with our regular routine as I was too busy mixing my cookies. They thought I was bonkers but the laugher and excitement was contagious.

Once the initial shock was over and they settled, I asked each student to go their table spot with a real rolling pin (that we use for clay) and wait for me to bring them dough. This dough was totally imaginary that I plopped in front of them out of my big mixing bowl. As they were rolling out the imaginary dough, I quickly had their dough "appear" by putting a piece of heavy weight manilla tag at their spot as if the dough became visible when rolled flat.
At this time I fessed up that we were pretending and they came up to the carpet to watch my demo of tracing cookie cutters and cutting them out. Cookie cutters can be a bit tough to trace so I put emphasis on the idea that cookies in real life don't turn out perfect either. This alleviated some of the pressure. And, I told them they didn't need to use the cookie cutters at all if they didn't want to. They were asked to make 4 cookies to make sure they were able to do all the "frosting" next art time. They also watched my demo of decorating a plate and gluing my cookies on it. I showed them some festive plates for inspiration but encouraged them to decorate however they wanted.
When they were done tracing and cutting their cookies out they had an opportunity, if they wanted it, to "bake" their cookies in our play oven on pans I created out of cardboard and tinfoil. I really played into it by making sure they wore my oven mitts from home when taking the pans out because they were "hot". Yes, there were some students who did not want to use the oven but I would say 95% percent did and loved it.
 In my 8 total classes of K& 1 not one section asked to do free art this day.

Day 2: Frosting with Primary Colors
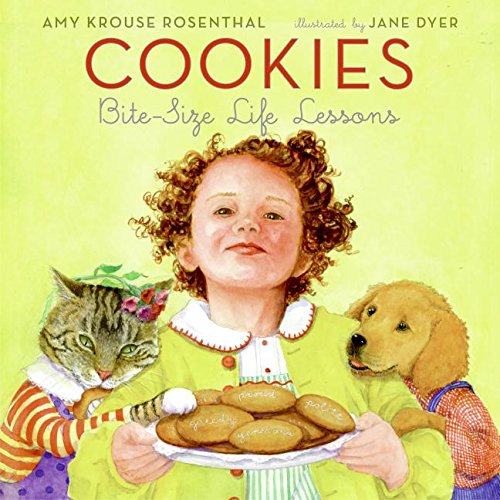
We kicked off the day by reading the beautiful story, Cookies: Bite-Size Life Lessons written by Amy Krouse Rosenthal.

Then we got to talking about the color wheel and primary colors and I used these two videos to help out the lesson. The favorite OK GO's Sesame Street primary colors song...
And this claymation (with the sound turned down-not great music) to predict the mixing...
When it was time to paint, to help with the success of the color mixing I printed 24 of the document below in color and had them laminated. Students did their color mixing right on these papers, I did one mix at a time going around the room squeezing out the colors onto their papers. They were asked to use each of their new colors on their cookies and to experiment with the paint for whatever cookies they had left. When they finished they gave the sheets a "shower" (under the running water) in the sink--not a "bath" (submerged) or the sheets don't last as long. The sheets made it through all 8 classes. You would have to reprint and laminate each year but its worth it, they really worked.


Now we did this project/lesson as if they were Christmas cookies but there is no reason you couldn't do it for any other time of year and just switch cookie cutters or do without the cutters. Valentine's Day would be fun!

Thursday, July 9, 2015

Alternative Color Wheels

My goal this year with my 6th graders was to do more open ended projects in order for them to connect more to their art and to enjoy art more. This project was a really fun way to see them explore color and the color wheel and how they interpreted both...

Not sure where I developed this lesson from, probably the color wheel eyes and umbrellas floating around on Pinterest.

I Can Statement: I can create an alternative color wheel and use paint to mix secondary colors.

Day 1: I wanted to see how much information they retained throughout their elementary years of 3+ different art teachers, so I started with a blank color wheel and asked them to fill it out, no wrong answers, just telling me what they knew. After they were finished I played my FAVORITE color concept youtube video to "reveal the answers".


Then I asked them to go back and correct their answers and fill it in based on this color wheel which matched their blank one... 

Screenshot 2015-02-01 at 7.34.42 PM.png

Once we revisited the basics, I posed the question "Does the color wheel have to be a circle?" This got all the gears turned and a ton of examples from the internet definitely answered the question that it certainly did not in fact have to be a plain jane circle... 


    Art_Class_Color_Wheel_by_WalkingxxSpazztic.png       tumblr_inline_n3evzfG3eT1qejulh.jpg

The biggest requirement was that they mix the secondary colors and showed the six basic colors in an organized way that represented the color wheel... Then they got down to sketching!

Day 2: After a quick 1:1 with me and getting sketches approved they got to work.

Day 3-5: Lots of work time and artist statements once again (insert student groans).


I am so proud of the work they did on these, proud enough that I even took the time to hand write comments on each of the pieces (over 60!) It was worth the intense amount of hand pain!


I received an unbelievable amount of comments and praise from other staff and students and it was well deserved! 


The only issue that arose during the project was that some students lost sight about the project being about the color wheel and color concepts and were just "mixing paint". But, it was my first time with this lesson and I should have put more emphasis on that. It was just so exciting to watch them create!


Monday, April 13, 2015

Jim Dine "Four Hearts" with 1st & 2nd Grade

Back in February I started introducing Contemporary Artists to a few different grade levels. First and Second grade were introduced to Jim Dine. It was right around Valentine's Day when I began to introduce him which was perfect timing as he is widely known his heart art!


Last year I started recording some of my demos ahead of time and during instruction I would play the videos and narrate as students watched. I started this at the end of last year, just twice, and I was really surprised with how many more students were successful. I believe what it came down to was they were in their seats, full attention on the screen, rather than standing around a table with the ability to chat. And be distracted by their friends. And standing so close they can't keep their hands to themselves.

Anywho, while I was making my example for this project, I realized it would be the perfect occasion to use this type of instruction.

I Can Statements:
I can create a heart artwork inspired by the artist Jim Dine.
I can mix primary colors to get secondary colors.

Day 1: Short introduction to Jim Dine and talking about the kinds of things that appear in his art work and talking about Pop Art. This is all done through this PDF artist poster I put together...


Then a closer look at this painting, one of my favorites....

Jim Dine "Four Hearts", 1969
I try to use color mixing as much as possible with younger kiddos so I decided to make the hearts four different colors that they would have to mix instead of duplicating Dine's work. So they started with watching my demo video and predicting what colors I was going to get as they watched me mix. Once the video was done they drew a heart in each corner of their paper. I tried with the first class to not have them break up the paper into four sections first, but it was a little bit of a bomb so for the other classes they drew a horizontal and vertical line to break up their papers before drawing the hearts.

AND THEN THE MAGIC HAPPENED. They got primaries and white and had to mix a green, purple, orange, and choice color (in no particular heart on their paper). I love watching them mix colors....there is so much joy in making colors appear by your own hands.


Day 2: Started with looking at my artist poster of Dine again and seeing what they remembered about the artist and then watching another demo video of creating the background. They used their fingers like stamps and this time did not have to mix secondaries to create their background. I covered/filled my background like Dine's piece but they were not required to.

Day 3: A few minutes were taken to trace their hearts with sharpie for a little extra pop!

Very happy with how these turned out and I could tell how much they loved mixing their colors and using their fingers to paint!

Jefferson Elementary...


McDill Elementary...


Saturday, August 23, 2014

Coloring Mixing Ice Cream Cones with 3rd & 4th Grade


While I had 4 classes for one last project with some of my 3rd and 4th graders I only had 2 or 3 with others. So, I changed up the final product of my 3rd & 4th Grade Color Mixing Gum Ball Machines to ice cream for a little faster project. A big pro of this instead of the gum ball machines was that they mixed with a little more intention and I was able to "require" an amount of secondary/tints/shades/intermediate which I didn't with gum ball machines because of the volume of painting.

I CAN statement for this project:
I CAN use my knowledge of the color wheel and color concepts to create unique ice cream "flavors" with paint.

Day 1: Intro! Literally the exact same as the gum ball machines except their name went on a long piece of sulfite paper instead of tag board.

Day 2: Quick review and then the painting was underway. I still did not tell them what they were making but explained that the painted circles should be roughly the same size and talked about how many secondary/tints/shades/intermediates I wanted them to try.

Day 3: For most of these classes it was the last day of art. I revealed what they were turning the painted circles into and gave them the tan paper and brown sharpies. They didn't need to use all of the circles they painted and could cut them smaller/bigger/into swirls if they wanted. We had PLENTY of time to play our last day of art games when they finished. I would of loved to have them do some writing and show them Wayne Thiebaud but that pesky time and end of the year craziness got the best of us!

Really enjoyed the extra detail some of them added!


Friday, August 22, 2014

Color Mixing Gum Ball Machines with 3rd and 4th Grade


When searching for a color mixing project to do with my older students I stumbled upon this pin, unfortunately the link is bad, UGH! COME ON PINNERS! The Pin links to an art page for Brookwood Elementary school, but doesn't go much past there...

 So here is a screen shot of the pin...from what I can tell the original was with 2nd graders and oil pastels. I decided to add tints and shades to the lesson and use paint and construction paper.


Once again, another awesome color project that I didn't have enough time for at the end of the year. It wasn't totally executed how it should of been and felt really rushed... I wish I had more time on this so I could of kept them from mixing without intention and had a requirement of so many secondary/tints/shades/intermediates etc. Regardless, It was still worth it every time they shot out of their seats and called me over to show me the new colors they had made :)

I CAN statement for this project:
I CAN use my knowledge of the color wheel and color concepts to create a unique gum ball machine.

Day 1: Intro! Obviously I started with the amazing YouTube color video again...it really never got old.


Then we used the same amazing TpT Color Mixing PDF that I used with 2nd grade . After we had our discussions and I became a human color wheel we filled in the color wheel just like second grade did but I added some of this TpT download, Color Buddies! The color buddies added tints and shades and intermediates which I was hoping they would encounter in this mixing extravaganza! After I checked off their sheets I wrote their name on a 1/2 sheet of tag board on the matte side and put it in a pile to start with next time. If they didn't have one at the start of the next class I knew I had to still check their worksheets.

Day 2 (3): Started off with a super quick review. Watched the video again and shot off questions about tints, shades, and intermediates. Then I revealed what we were making and how we were going to spend two whole classes painting like maniacs. The goal was to paint the gum balls as close together as possible and when sections dried overlapping the dots with more dots. My emphasis was quality not quantity so they were not restricted to size. They had two days to paint and needed to paint the entire time. The final size of the machines had no specifics so some only filled a small part of the page while others filled it full.

My classes with less time at the end of the year only painted for 1 class period, which meant smaller machines but was still just as exciting, and effective.

Last Day: We started the class browsing images of different gum ball machines and looked at all the different possibilities, I wanted them to know it was pretty much limitless so I felt this discussion was really important. The most challenging part was explaining how to find/create the sphere of gum balls in their midst of dots. Some students had really small areas with paint while others filled the page. I set out a variety of circles objects that could be traced for the sphere and showed them how I found mine. I looked for the sections with my most vibrant colors that filled the sphere well and made it appear like it was not full. The key was to not have floating gum balls. Some students used colored sharpies to add a few more gum balls so they could use the section they really wanted.

So before they cut their pages looked something like this....


The "wasted" dots not inside the circle were used to create extra details in their machines...like falling gum balls or the one they just received from their machine!

It was pretty open as to the rest of the creating... it had to have a base and place for the gum ball to come out and those were the only requirements.

 Some students went more traditional...


Others went a little more creative...


This project will for sure be a repeater in the future!