Pages

Showing posts with label Paper. Show all posts

Thursday, November 3, 2016

Matisse Paper Cutouts (2016)

This is a favorite project for me that will probably be a repeat every year---it's a good way to get my 2nd graders to just relax! Check out my previous posts for this project here and here.

Made a few big changes to the project including a pretty big emphasis on geometric and organic shapes and using glue sponges.

I Can tell you something about the artist Henri Matisse.
I Can cut organic and geometric shapes.
I Can identify and sort organic and geometric shapes.

Day 1:
Introduced Matisse with this great video!


Then we looked at his artwork and discovered that he used a lot of shapes and dived into organic vs geometric. After we talked about organic and geometric shapes, they paired up with dry erase boards and I put different shapes up on the SMART board and they had to identify them as organic or geometric. After a few rounds of that,  I showed them my example and told them to start cutting (without much instruction) and gave them a large envelope to keep pieces in.


Day 2:
Reviewed organic and geometric shapes using Plickers (USE IT, you only need 1 device!). As a review of Matisse they filled out their artist book pages,which have gotten a little revamp from last year. I'll update on those soon. After their page was filled out I showed them my demo of cutting a variety of shapes and sizes in different ways to get their wheels turning. They spent the rest of the time cutting away and adding to what they already had cut last time with reminders to be cutting both organic and geometric.


Day 3:
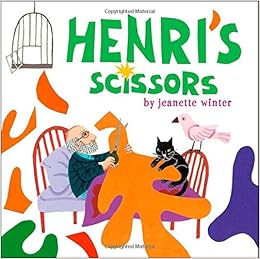
Reviewed the shapes with a little shape sorting as a whole class using laminated shapes. Then they heard a Matisse book that I highly reccommend. Henri's Scissors by Jeanette Winter, found here on Amazon.


After the story we watched my demo video of arranging and gluing and talked about composition. "Bad" examples are always important during this step for my kiddos to really understand what makes a composition work (and not work). 

The second big change for the project was using glue sponges to assemble their artworks. It made a HUGE difference in craftsmanship and glue amounts...i'll NEVER go back for this project.  Not everyone finished gluing so I had them toss out or take with their extra paper that they weren't using on their projects and only had them put the pieces they were using on their projects back into their envelopes. 
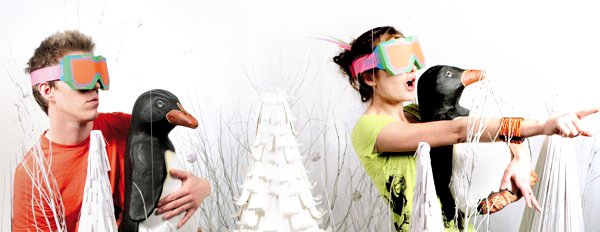
Love this little section--started off as a gun (a no go!) and transformed into a spigot! 

Day 4:
Students who didn't finish last time had time to finish and we wrapped up by filling out part 2 of our artist book page and filling out a rubric for the project that included a shape assessment. Check it out, let me know what you think. My elementary art team has been working super hard on developing rubrics this year...


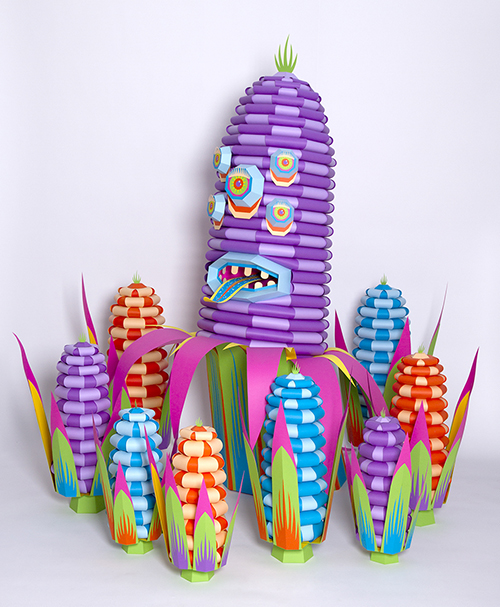
Love love love love LOVE this project. The color! The shapes! The movement! They just can't go wrong...

Sunday, August 14, 2016

Radial Paper Relief Sculptures (2015/16)

If you havn't seen Art with Mrs.Nguyens posts on these babies (this is just one of her many posts on it) then you have been seriously missing out. Her TpT lesson for these is worth every penny and worked perfectly for my 4th graders. I did change up the powerpoint a bit to fit my style but other than that I used all of her resources, including the video teaching the folds. 

I Can create a relief sculpture using paper that has radial symmetry.
I Can use color in an organized way.

Before you do anything to start this project, cut about a billion* pieces of 3x3 construction paper in all different colors. After cutting I divided up into ice cream buckets, one for each table.
*There is really no way to know how much of what colors they will use. I started with 4 pieces of 12x18 construction paper of every color that I had and cut more as they used them.

Day 1: Learning and practicing radial symmetry.
Using the awesome powerpoint by Mrs. Nguyen and modified by me, I introduced radial symmetry to my students and then we spent the rest of class with my buckets of "junk" making radial symmetry on big 24x24 sheets of paper. The paper has basic radial symmetry guidelines drawn on them and students work in table teams to create the most interesting radial symmetry.
My only warning with this is sometimes they get carried away with the "junk" and start getting in fights about what table has what and who can borrow and who can't. Squash it fast.

Day 2: Review radial symmetry and learn the folds. Talk about organized color.
After a review of radial symmetry I show them the handouts that teach the folds and we watch the video of learning the folds (both by Mrs. Nguyen) together. Then they grab one piece of 3x3 paper for each fold and go back to their seats. We watch the video again, pausing where needed to follow along making the folds. This process worked really well because those that got it right away kept going and those that didn't followed slowly with the video.

 After we finished all the folds they went nuts folding whatever they wanted to use for their project and put them in a big envelope with their name on it for next class. Students that had more difficulty with the folds met me at the carpet and we went through the video again (maybe 1 or 2 kiddos per class). A little ways through I brought them all back up front to talk about our I Can statement of using color in an organized way. They had a choice of either using color symmetrically or using patterns and balance with color. I showed a lot of examples from Mrs. Nguyen's powerpoint.

Day 2: Another review, folding the background.
We reviewed radial symmetry again by looking at a variety of pictures and they had to use plickers to tell me if the image had radial symmetry or not. Check out the video below to see how plickers works. Its seriously the best. AND FREE. AND students LOVE it.

 After that they grabbed the black paper (12x12 square) and we walked through the folds together as a class to get the folded guidelines for their paper relief sculptures.

At this point the workflow became different for different students. Some wanted to fold everything before gluing and some folded and glued at the same time. It didn't matter to me as long as I could see them making smart choices in their art.


I highly recommend using glue sponges for this project. It allowed for such clean and beautiful work. We used popsicle sticks to rub down the paper that was in a tight space if their fingers wouldn't fit.


Days 3-6: Workdays and extensions.
Give them a lot of time on these, it is so very worth it and hopefully they will love this project as much as mine did. Towards the end when some were finished and some weren't, I had two follow up activities they could do. Make a radial symmetry drawing out of their favorite things, or make a group radial symmetry paper relief sculpture on 24X24 paper.


Monday, May 30, 2016

End of the Year Paper Sculptures

The last few weeks of the school year are in full swing. All 400ish portfolios are handed back which means one day-no grade-"Take it with you please!"-projects are happening all over the place.


THIS is my favorite. Any class that was caught up and had a day or so left with me are making these wicked awesome paper sculptures. HUGE thanks to the ever brilliant shine brite zamorano for the inspiration via this post from pinterest.

These were done with a variety of K-4 classes and were incredibly open ended. I made the video below (Sorry I don't do sound!) to show them some of the basics and just "required" them to do two pieces of paper as the base. The two paper rule was to give it a little weight so they wouldn't lift when they started gluing. Everything else they did was up to them. Most students went abstract but I had a few do playgrounds, roller coasters, houses, and masks.


The only two negatives were the prep of cutting all the paper and having K & 1-ers wanting to do the cylinder and having difficulty gluing it down with enough glue to keep it on. There was a lot of end of the world tears when that happened.


My FAVORITE thing that happened was no one asking to do free art in my 3 & 4 classes because they were so completely engaged (which says a lot for the last 3 weeks of school).


HIGHLY recommend this as an end of the year project, if you have any paper left that is!

Sunday, January 31, 2016

THIS ARTIST DUO THOUGH....

Three things you should know about me...

#1 Paper is my favorite medium to work with
#2 All of my work is about color
#3 I excelled in 3D in college but never found the best way to pursue it in my personal work outside of college so I have a pretty deep love for it

Here is why those three things are very important...

Someone posted (on the incredible) Art Teacher Facebook group a link to an installation of a French duo who create mostly paper art and I am IN LOVE. They call themselves Zim&Zou and started off in Graphic Design and moved to working with materials like paper, thread, and wood.

Do yourself a favor and spend hours exploring their website...


Most of their projects are also geared around bigger issues like genetically modified food and the food industry...


They even have some videos and images of their process so great resources to show to students.
Edible Monsters - Behind the scene from Zim and Zou on Vimeo.

Now I just have to come up with a project to connect to!

Friday, August 7, 2015

Stylized Food Chains with 5th Grade

Final product wise, this might just have been my FAVORITE project this past school year. I am so unbelievably proud of the work these 5th graders did on these! I found this project here via Pinterest. Thanks a faithful attempt!


I Can Statements:
I Can talk about stylized art
I Can use the Library resource A-Z Animals Encyclopedia to research a food chain that includes 3 or more animals
I Can show a food chain mouth-in-mouth using stylized images of plants and animals

Day 1: Students came in with this image on the screen...


I asked them to figure out what they all had in common, eventually they ended up describing stylized without even knowing it (I love when that happens!) and I revealed the vocabulary of stylized. To better explain I showed them this awesome graphic I put together in lucidpress....


After a bit more discussion we had a "quiz" where I put up an image and they had to guess stylized or realistic. They did perfect. Then I showed them our inspiration image...


They just wrapped up a science unit about ecosystems and food chains so it was the perfect project to connect to the classroom. After explaining the I Cans and the how to do the research and navigate the site they were using for research, they grabbed laptops and got to work filling out the packet below. There was quite a bit of sketching involved but it really seemed to help them understand how to break down their animals and plants.


Day 2: After I approved their sketches they got to work! They had an option to draw and color with colored pencil or to collage with paper.


We took about 4 class periods total on this, 1 for intro and research, and the rest were workdays. Next time I will probably have them writing something to go along with them when they are displayed.


 I just can't contain how happy these make me!

Tuesday, August 4, 2015

Chinese Dragons with 1st Grade

Sometimes I do a project that I think will be really fun and when the kiddos get down to working on it, the spark is missing. While they didn't complain about this project I really felt their enjoyment lacking so I will have to play around with this one a bit if I decide to do it again in the future....

I Can Statements:
I can discuss the difference between Western and Eastern dragons.
I can create an Eastern dragon using paper and string.

Day 1: For the introduction to this project I made a few google slides comparing and contrasting dragons from the two parts of the world. Because I was saying "Eastern" and "Western" so much we used our large world map in the room to to review directions and sides of the world. Then we talked about how dragons show up a lot in different festivals and they got to watch this performance video I found on YouTube...


When it was time to work I started with a demo on my document camera of gluing the string down and using the template I made below like a map to put the pieces over the top of to see if they were similar size and shape to what I needed... they were not required to use the template but many did. Then they got to work using the scrap boxes to make their heads of the dragon.

Day 2: Had them tell me differences between Eastern and Western Dragons and I was so happy to find that they remember a ton! Did a short demo on the document camera about using the "funky scissors", as I like to call them, to cut strips of scraps to be the body. I also showed them that I measured with my finger to make sure they weren't too skinny or fat otherwise too many will get covered up when the dragon curves. 


When they were done working I had a variety of How to Draw dragon sheets for them to use and draw dragon pictures from...I'll show you those later!


Changes for next attempt: We were a bit short on time because it was the end of the year but I was thinking about adding a border and possibly talking about calligraphy. Also switching up the materials into something more fun? Maybe adding some metallic paper?


While I don't think this was up there with #1 projects they loved they sure learned a lot and that I am proud of!

Monday, June 8, 2015

Paper Self Portraits with 3rd and 4th Grade

Sometimes projects turn out exactly how you envisioned them...and this was that time! It did end up taking slightly longer than I thought it would, nonetheless it was a fantastic end result!


I Can Statement: I can create a self-portrait out of paper that shows my hobbies and interests and meets the checklist requirements.

Day 1: Started the lesson with a quick Prezi about a few mind-blowing paper artists....


Next we looked at my example to determine what it said about me and to guess how many pieces of paper I used to make it. I was smart enough to take a picture of mine before I glued it all down...


Then I presented to them the checklist they were be going to be using for the project to make sure they were meeting requirements, it was attached to an envelope they kept their pieces in while working. This checklist is me hopefully moving in the direction of rubrics!

Here is the checklist:


Days 2-4: Because of the the detail required in this project it took almost all of my groups 3 or 4 days to complete their portraits. Well worth it! When they were totally finished, I had them add their "signature" to add an even more personal touch. SO SO proud.


*One side note, I HATE gluesticks because they just don't stick well. I know I know, hate is a strong word but HATE. My students were not happy about using regular glue but once they saw me putting it on the table and dipping pieces they were thrilled! What a rebel Miss Lapin!