While first, second, and third graders were busy working on their Summer in a Jar for the end of the year, fourth through sixth were busy creating these awesome works of art. Like the jars, this could also be a great project at the start of the year to help learn or refresh names and get a visual assessment of their skill levels.
I wanted something for them to do that they could work very independently on so I could get students that were missing work caught up and work on cleaning the room for the summer (and my eventual exit from the district). Before they started working I showed them some different examples of name art (see below) and told them my expectations. Challenge yourself, use the whole page, do your best work, and do something different. They could use any "dry" medium. And could use their full name, nickname, part of their name, or initials.
This is a favorite way to end the year for me because most of them really walk away feeling proud of their art no matter what style they did or materials they used!
Final product wise, this might just have been my FAVORITE project this past school year. I am so unbelievably proud of the work these 5th graders did on these! I found this project here via Pinterest. Thanks a faithful attempt!
I Can Statements:
I Can talk about stylized art
I Can use the Library resource A-Z Animals Encyclopedia to research a food chain that includes 3 or more animals
I Can show a food chain mouth-in-mouth using stylized images of plants and animals
Day 1: Students came in with this image on the screen...
I asked them to figure out what they all had in common, eventually they ended up describing stylized without even knowing it (I love when that happens!) and I revealed the vocabulary of stylized. To better explain I showed them this awesome graphic I put together in lucidpress....
After a bit more discussion we had a "quiz" where I put up an image and they had to guess stylized or realistic. They did perfect. Then I showed them our inspiration image...
They just wrapped up a science unit about ecosystems and food chains so it was the perfect project to connect to the classroom. After explaining the I Cans and the how to do the research and navigate the site they were using for research, they grabbed laptops and got to work filling out the packet below. There was quite a bit of sketching involved but it really seemed to help them understand how to break down their animals and plants.
Day 2: After I approved their sketches they got to work! They had an option to draw and color with colored pencil or to collage with paper.
We took about 4 class periods total on this, 1 for intro and research, and the rest were workdays. Next time I will probably have them writing something to go along with them when they are displayed.
UPDATE! E-mailed James (Dalek) the post to my blog to share with him my students work and this was his wonderful response.. the awesome perks of being inspired by artists still alive!
Thank you for your email and the link to your blog . I love the day by day break down and the fact that you used sharpies : ) the pieces look amazing . It's always cool to see how these sorts of projects come together . Their color selections and compositions are really cool !! It's really kind of you to share this with me . Please share with the kids that I'm impressed with heir final pieces and please don't hesitate if there are questions I can answer
I can statement: I can use line and color like the contemporary artist Dalek in my artwork.
Day 1: Started off the project with a little background of Marshall and the transformation in his artwork from his space monkey character to his current work. Warning! Make sure you look carefully at his space monkey work before showing students....a lot of them are featuring him stabbing or in other "bad choice" situations as I share with my students.
We also watched a great YouTube video of Dalek working on a mural in Colorado which provided a great platform of discussion about whose artwork it is if others help.
After the mural discussion, we took quite a bit of time exploring his newer artwork and came up with a very impressive list of qualities in his work. I wish I would have taken a picture of the board with their ideas! I was so impressed with the way they spoke about his art and the vocabulary they were using!
James Marshall (a.k.a. Dalek)
They all started their pieces with me with a few required lines. I had them do one vertical, one horizontal, and one diagonal to make sure they had a good space to start with. Before I sent them off on their own, I demoed a few of the more intricate drawings they could do but were not required to do. They spent the rest of the time drawing. Any circles were created by tracing lids and all lines with rulers.
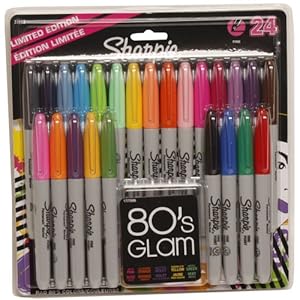
Day 2: Now let me tell you how wonderful my PTO is! Each year I get some funds to use on whatever I want for my classroom and this year I decided to buy large packs of multicolored sharpies that were CRAZY on sale at staples. Like $9 on sale. I knew they needed to be used on this project!
When students were ready to color on the second day I made a huge deal out of these sharpies. We talked about how only 4th-6th graders were going to be allowed to use them and the best way to color with them to keep the tips sharp. I was so pleased with how well students took care of the markers! They might even last to do this project again next year!
I think sharpies were a great choice in material because looking at his work the solidness of the colors really added such a striking visual quality. And it did to their work too, even when their design was lacking.
LOOK AT THIS COLOR (and design)!
Days 3-5: Work days! Each day we reviewed how he used color in his work as reminders about how to use it in theirs and not just get excited about all the colors they had to choose from. Even though the final artworks were only 9x9 it took them quite awhile to finish but I was more than okay with that because I knew it meant a higher quality of work!
Sometimes you get a total hit with projects and other times its a massive miss.... Luckily those misses don't happen often! Unfortunately 5th grade got hit with a miss!
Both 5th and 6th grade just finished up pretty lengthy projects before this, so I wanted to do a little more of a short and sweet/ cut and dry project to re-inspire my students who get frustrated with long projects that are a higher skill level. Snowflakes are a great answer to that predicament.
There are a couple versions of this floating around the internet and pinterest this just happens to be a primary version that I found.
I can statement: I can talk about composition and use good composition ingredients in a snowflake artwork
Day 1: Started off with an intro about composition including this great little youtube video...We also looked at some different artwork and talked about what made it have a good (or bad) composition.
Then they did this worksheet as a review of what we just talked about and to do some brainstorming for the project...
There were a few kids that even botched this worksheet and didn't get that they DID NOT have to draw actual snowflakes in the boxes. This was already making this project worrisome...
Day 2: After looking at the worksheets I knew I needed to talk about composition again and finally saw light bulbs going on. Now when it was time to start, I knew going into this there would be some frustration about not being able to see what they were drawing with the white crayon so I prepped them good and plenty for that part. I had very little complaints actually :) At this point I probably should have talked about pushing really hard and not to use the hard white crayons but they were passed out before I even noticed they were in the container...
When the first kiddo was ready to paint I did a demo on my own about taping down my painting, selecting warm or cool colors to do the wash in, and the science of the salt acting how it does with the watercolor...and then they got to work painting when they were ready...
Now I love me some crayon resist. And it almost always a guarantee success but in this case it flopped. I don't know if we weren't using the best white crayons we could of used or they didn't push hard enough, maybe too much watercolor but a lot of these projects got botched. Only a handful of students in each class ended up with a great project.
Day 3: I tried to ease the pain by letting them add fake snow or glitter to one of their snowflakes. They were pleased and accepted my apology! And while they started on their next project I called them over to add the finishing and somewhat "fixing" touch.