Okay still running behind on fall project posts...again, thanks to break for me catching up!
A fall favorite and good line intro/review for my Kindergarteners and 1st Graders. I did a similar version of this project in the past but it develops and gets better each year.
I Can Statements: I Can identify different types of lines. I Can use 5 or more different lines in my tree. I Can use watercolors appropriately and correctly. I Can follow directions to print with bubble wrap and brayers.
Day 1: Read "Lines that wiggle" and drew the lines in the book with our arms in the air as we read. Had them take the sheet below to their spots, I named a line and then they had to trace it before finding the same line on the floor and walking across it. I put the lines on the floor with vinyl floor tape the week before and they are still there almost 2 months later, and after many floor washings. It's good stuff!
Back to the carpet to watch the demo for tracing their arm and adding 5 or more different lines with brown oil pastel.
Day 2: I drew a picture on the SMART Board made up of all different lines and a key. Called kiddos up to find a certain line in the picture and circle it or X it. They seriously loved this. After this activity they did the watercolor on their trees and sky.
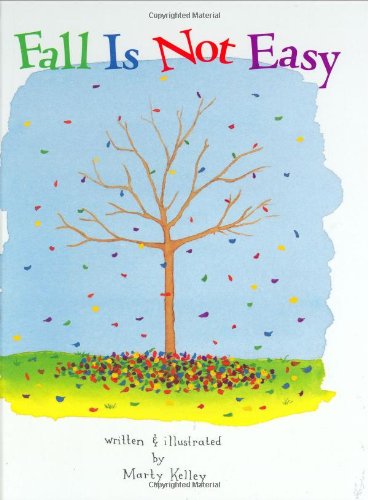
Day 3: Read a new favorite book "Fall Is Not Easy" and they watched a demo of how to use the bubble wrap to do the leaves on the tree. I had a station set up in the back of the room for this and they would put the paint on their bubble wrap there and carry it back to their spots to add it to their tree.
Okay so I'm a little behind posting since we did this in fall....but that is what break is for!
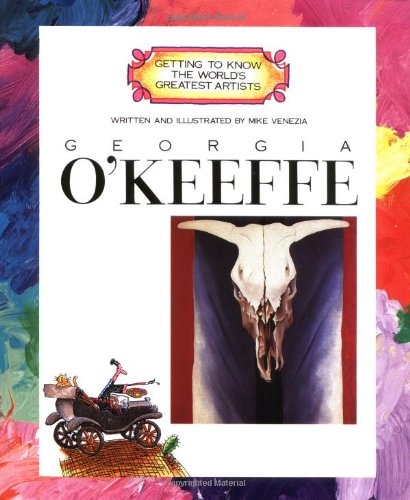
Second grade Elementary Art Curriculum is focused on artists. After we wrapped up Matisse and our paper cut-outs we moved on to Wisconsin's own Georgia O'Keeffe.
I Can Statements: I Can talk about Georgia O'Keeffe. I Can practice drawing many different kinds of leaves. I Can draw my best leaf using the whole back of my paper. I Can add details and an outline to my leaf with my best craftsmanship.
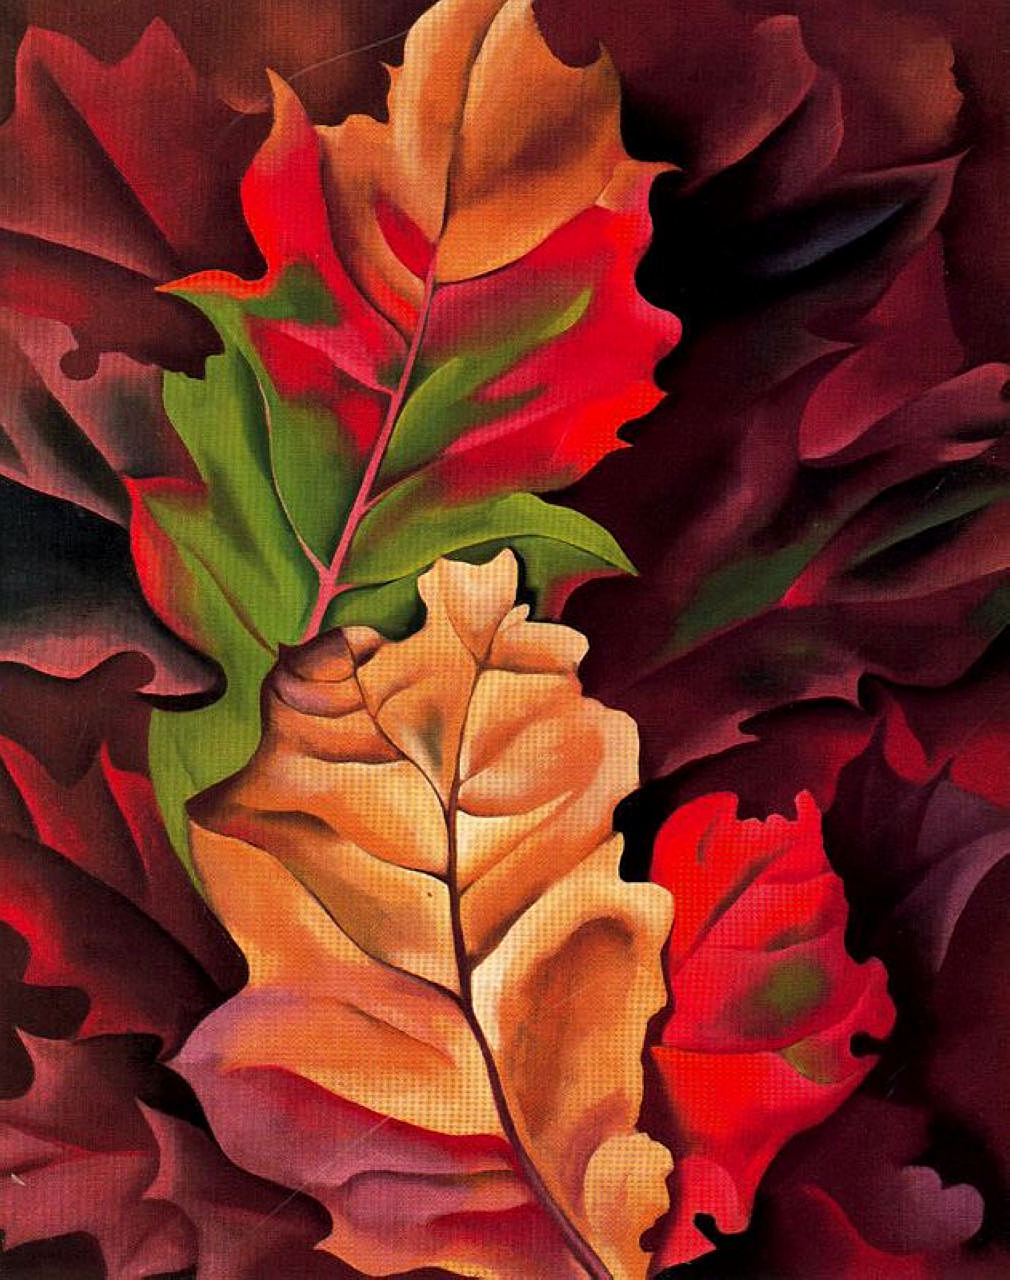
The project is based on one of my FAVORITE O'Keeffe paintings....Autumn Leaves, Lake George
Day 1:
Learning about O'Keeffe and filling out our Artist Book, Talking about fall color schemes, creating painted paper
Day 2: Practicing drawing leaves with the worksheet I made below then drawing the best one on the back of the painted paper they made, adding outline and veins with black tempera paint and flat head brushes
Day 3: Read slightly longer (but awesome) book from the Getting to Know The World's Greatest Artist series: Georgia O'Keeffe then had kiddos that didn't finish last time finish.
Resources I used:
Awesome bio video with her art and stop-motion animations, I read aloud the things that were written.
We used oil pastels for the trunks. Thinking the trunks should have been thicker or maybe paint. I would possibly do this with Kindergarten or First grade for a one day project and maybe adding more to the background...inspiration came from this image only post via pinterest.
This is a project that has transformed from one I did last year with my Kindergarten and First Graders that you can see the original post from here. However, these ones are a billion times cooler with the bubble wrap printed leaves instead of the paper ones. I do also really enjoy the grass added to the bottom. I had my Ks and 1sts do them this year too but forgot about the green! Stay tuned for that post.
Another repeat from a project I did with Ks and 1sts back in 2013. See the original project post here. Didn't make any changes except for not including the wind.
A super quick (30 minutes or less) but fun activity we did. I created tracers of pumpkins and leaves and they cut and did texture rubbings on them. Inspiration came from pinterest via this post.
This was an incredibly fun one. We created painted paper (front and back) and used a variety of brushes and bubble wrap of different sizes for the leaves and then painted the tube roughly with brown for the trunk. The next class we cut out cloud like shapes from the painted paper and inserted them into slits I cut in the tubes. Inspired by this post via pinterest.
This was the first real flop I have had with this group....The picture on the left was from the pin on pinterest via this artsonia post...and the two on the right are the best two from my group. Either I didn't do enough modeling or this was just too much for them. Might try again next year in a simpler way.
And last but not least, one of my favorites.... We had talked a lot at this point about leaves changing colors and how and why and this was a really fun visual representation of that. I had a leaf tracer for them and then we used oil pastels to color and try to blend to get the transitions of changing. I thought this one was also Pinterest inspired but I cannot seem to find the pin. Maybe it was my idea!
I'm still learning with this group and 3 days a week for 45 minutes is a lot of time and lesson planning but it is teaching me so much and it is such a relaxing part of my day that I really cherish!
Being at two buildings, for me, means teaching a lesson/project anywhere from 4-10 times! 4-5 times if I only do a project with one grade, possibly 10 times if I do the project with multiple grades. This allows for a lot of adjustments from the first time I try a project in the rotation to the last. Sometimes I make huge adjustments. In this case it was a shift in materials that allowed for more choice for students and allowing students to work to their strengths. I can't wait to see how projects develop throughout the years considering how this one did in 3 classes...This project was inspired by this post via Pinterest.
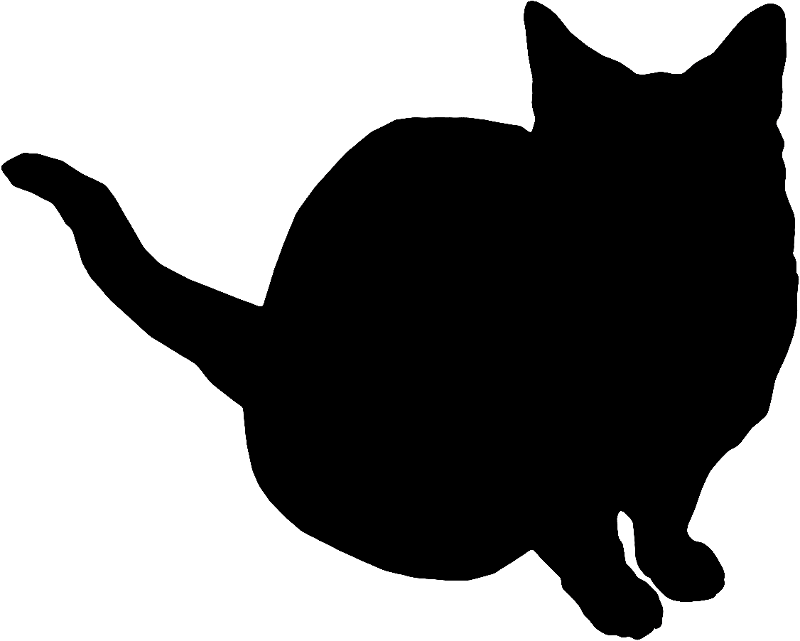
I can statements: I can create a fall silhouette that reflects my experiences and my knowledge of nature. I can write an artist statement
Day 1: Started the project off with exploring a few works of art with pretty famous names attached like Claude Monet, Thomas Cole, Van Gogh, O'Keeffe, Giuseppe Arcimboldo, Klimt, Kandinsky and a few others. They all had one thing in common, images or titles of Autumn in the work. Eventually the discussion led us to talking about color scheme and possible fall color schemes. When it was finally time to get their hands messy they got a piece of cardboard that came from a cereal box and red, orange, yellow, and brown paint. They basically painted it as if they were doing painted paper. Textures, blending, mixing, and experimentation were encouraged. If they didn't like the end result of one they had the opportunity to do a second.
O'Keefe's Autumn Leaves - Lake George N.Y.
Day 2: Started the second day off with looking at different silhouettes. First photographed silhouettes and then digital or drawn silhouettes. I asked them who/what the silhouettes were of how they knew they were right. Doing that really brought them to understanding of what a silhouette was as far as how to give minimal information but still enough that viewers know what they are looking at.
Finally they started planning out their project with this planning sheet and prompt:
"In each box sketch something different that makes you think of fall or autumn. Try to connect it with a memory for more meaningful art. Remember these will be silhouettes, you do not need inside details."
Day 3: Creating the silhouette is where the change happened. I started seeing the frustration in some students with cutting and getting the details they wanted so by the 3rd time (now at my other building) I decided to let them work to their strengths. They could use either paper OR paint to create their silhouette. The only issue was seeing painters get upset when things weren't going well and not being able to "correct it" or "fix it" due to the material choices they made.
Day 4: Many needed a second work time for more layers of paint or gluing pieces on but before they started I introduced to them writing an artist statement. Browsing around online I found this great definition and list of things to write about in two different places. Leave it to me not to remember and not being able to cite my sources....This was the first time I had students write an artist statement but I knew I would be doing more in the future so I wanted to put together a generic sheet that I could use with multiple grades on multiple projects. There is a good amount of lined room under the prompt for the rough draft....
Day 5: One more day was needed to type artist statements and for a few to get caught up!
This is why blogging needs to be a part of my New Years resolution...still posting about FALL projects!
With all of the Educator Effectiveness this year I knew I wanted my SLO to be project based to make things easier on me ergo, this project happened! Long SLO short...I am doing a variety of tree projects with my second graders to increase their ability to draw trees more realistically. This project is the first of two (maybe three) they will do this year. I am only following a sample of students but all of second grade is doing the project...
These two were selected for the art show at our district office!
I Can statement for this project: I can learn to draw trees more realistically.
Day 1: Because I needed a baseline for my SLO we started the project with the prompt to draw a tree. That was the only direction I gave. I gave them about 5 minutes to do it and the results were pretty varied. To start the rest of the lesson I showed them the PDF below of different trees in different seasons and had them compare and contrast their drawing with the images...
We then turned the conversation to looking at how trees grow (visually and scientifically) and even took some classes outside to figure it out. We ended up at the conclusion that they start as one (the trunk) and keep splitting into smaller and smaller branches. After this "ah-ha" moment I showed them how to draw trees using the letter V. I have had a lot of success with this method as a starting point for observational drawings of trees! This is how I explain/demo it...
After they practice a "V Tree" on back of their first drawing prompt they could start on their project. Many enjoyed just practicing and kept working on that the rest of the time. I collected the practice to have my first measurement of learning for my SLO by comparing their prompt to what I had just taught them.
Day 2: I quickly refreshed how to draw the "V Tree" and they got to work drawing on good paper. The next step was tracing their tree in brown sharpie. Once a few had that done we breaked to learn about mixing colored pencils (in this case multiple browns) to make things look more realistic. Then those who were ready started coloring.
Day 3: A little inspiration when they came in the room from this beautiful time lapse of fall...
After the video I started the class with a demo on how to apply the tissue paper to create the leaves on our trees. I had pre-mixed containers of 40/60 Glue/Water concoctions for them to use with old brushes to apply the tissue paper. Oh my gosh did they have fun with this!!
There was a handful of students who did not finish during that 3rd class so took some time the next with a few stations set up on the counter for them to finish.
I saw a lot of pride in my students with this project and I love the kiddos that added treehouses and other little details like animals to their trees totally unprompted :)
McDill Elementary...with this and this project....
Jefferson Elementary...with this project....
I was inspired by this post via Pinterest for this project but changed it up quite a bit from the image.


