Pages

Showing posts with label Shapes. Show all posts

Monday, February 13, 2017

Winter Shape Architecture (2016)

Focusing on shapes while teaching architecture to K&1 seem to be a perfect fit. Around Christmas and during winter adds a whole other creative layer for students!
I Can identify the shapes in my artwork.
I Can tell you what an architect does.

Day 1: Intro to Architecture and Building
If you want a great story for introducing architecture read Iggy Peck, Architect by Andrea Beaty it is easy to understand and just the right amount of silly.
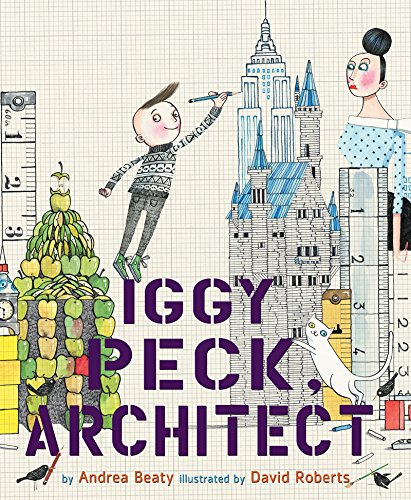
I started our lesson with that story and then had them watch this StoryBots video to reinforce.
We talked about all the different kinds of buildings they saw in the book and video and afterwards I had them think-pair-share about what they were going to build using shapes. We did this before they saw my example and my demo video so they wouldn't be set on building a house like mine. 
Because identifying and not creating the shapes was the goal of the lesson I provided cardboard tracers of the basic shapes in all different sizes. If they wanted to draw shapes other than those basic ones they were encouraged to do so. They used glue sponges to assemble their buildings.
Day 2: Shape Graphing and Details.
To put the focus back on the shapes, we started this second day with the book Shape Shift by Joyce Hesselberth.
Then using my artwork as an example, together we graphed out on a basic bar graph, the shapes I used to build with.
They were then asked to do the same with their artwork. We did this before adding details with construction paper crayons to avoid the confusion of graphing any shapes they might draw. They could have included those shapes when graphing, but I wanted to keep it consistent and make sure I knew what they were looking at when I graded.
After they finished graphing we met back on the carpet and they watched my demo of adding details with construction paper crayons and brainstormed all the different details they could add. It was close to Christmas when we worked on these so there was a lot of Christmas related ideas. Pokemon is the big thing right now so that inspired a lot of kiddos too. Some decided on a combo of both!
Day 3: Snow and Architecture Centers.
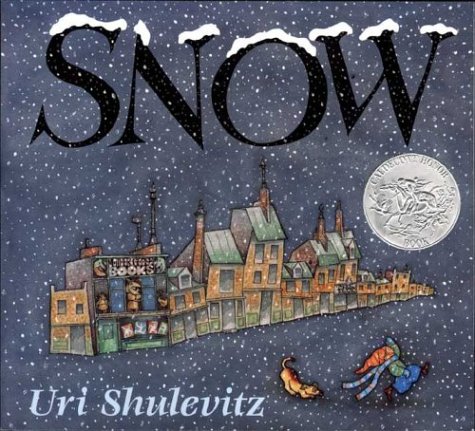
To wrap up this lesson and unit we started with the book Snow by Uri Shulevitz. It has great pictures of a city (architecture!) during a snowfall which was perfect segway into the snow part of the project.
They watched my demo video of adding snow with a small paintbrush and Q-tips and were sent to explore the different architecture centers I had set up for them. Many were building toys like blocks, legos, straws and connectors, and also coloring sheets of different types of buildings. While they were exploring the centers I called them back in small groups to add snow if they wanted to add it. They did not have to.

Just LOVE this lesson and how they put all their awesome individual ideas into them. They are now on display at our district office because I loved them so much :)
                        

Tuesday, July 26, 2016

Painted Paper Shape Bird Houses

There was so many great birdhouse lessons floating around Pinterest this year that I was inspired to try a version of my own. Just to name a few, inspiration came from these posts from these blogs: For the Love of Art, Kids Artsits, Art with Mrs. Nguyen, and Painted Paper Art.

I Can Statements:
I Can create a birdhouse using 5 or more shapes.
I Can identify the shapes I use in my birdhouse.

Day 1: Painted Paper!
I recently just got to the painted paper party so we had to take an incredibly fun week in Kindergarten and First to make a lot of painted paper. Each day in the rotation was in charge of one color. Each student got to make a 18x24 piece of paper that got cut down into 4 smaller ones when dried.

Day 2: Birds!
They did a bird draw along with me straight with sharpie. While drawing, we talked about all the ways they could make them different and give them different personalities even though they were all following the same basic drawing. For painting, they used smaller brushes and all colors were made available. I wasn't planning on the birds being more than three colors, the plan was body one color, wings and tail another color. However, I forgot to say that and it naturally took off to paint them in any way possible! Some ended up with stripes, some with polka dots, and some with every color. They turned out more beautiful than I imagined, after all, this year was really about letting go and this proved to me the magic that happens when I do.


Day 3: Assemble the houses!
At the start of this class we had a really great time looking at a LOT of different birdhouses. I tried to find the greatest variety of colors, sizes, shapes, designs, and themes and after looking at the images we made a list of what a bird house had to have.
Here is what they came up with:
1. Hole for the birds to get in
2. Roof
3. Main house
4. Walls
We also came to the really excited conclusion that they could look like ANYTHING!

After this amazing discussion took place I talked about creating our bird houses using shapes and all the shapes they know and can use. Then they watched my demo video of constructing my house. The big take away of the demo video was drawing on the white side of the paper. I did provide circle tracers but all the rest of the shapes were drawn free hand.
(Assembled birdhouses without oil pastels or birds)

Day 4: Put a bird on it!
On this last day we started with a brief shape assessment, I handed back houses and gave them the assessment you see below and they counted up their shapes, wrote them down, and handed it back to me with their name on it.

 After we got that out of the way it became the best day ever! They got their birds back, still on the white paper, and they watched my demo of decorating my house and adding my birds. I highly encouraged them to use all the lines we focused on a bunch throughout the year as well as patterns and themes. All the decorating was done with oil pastels and black sharpies. I did put the paper back out this day for them to add more shapes if they needed/wanted to add more.


 My favorite part was them attaching their birds. Most kiddos painted two birds so I gave them the option of using both or just one. They attached them using one of the coolest art supplies ever--3D-Os. Sold here by Dick Blick or School Specialty. They are a foam circle with adhesive on both sides, they give a subtle 3D effect by hovering about a 1/4 inch off the paper.


In the bottom left birdhouse above the student accidentally cut off the bird's legs and this was his problem solving solution! YES!


Bottom right and top above, Lots of "love birds" appeared in first grade...

This lesson/project was SO FUN and colorful and the students loved it as well.

Thursday, May 5, 2016

If the Dinosaurs Came Back (2015)

This is another repeat project that I did with students in my last school. You can check out the original lesson here. It's such a fun way to teach finding shapes to draw with K & 1 because DINOSAURS!


I Can draw a dinosaur using shapes
I Can draw a city with a lot of detail

Day 1: Read a book that is probably in my top 10 list of Best Books for an Elementary Art Room... "If the Dinosaurs Came Back" by Bernard Most. The way he uses colors only on the dinosaurs is my favorite part and a great conversation piece to talk about with students.


After we read the story, I had a few pictures of dinosaurs on my SMART Board and had students come up and draw the shapes they saw over the top of the dinosaurs. I 100% believe this was a part of the process that made my students successful on this project. After this practice, I gave each a fabulous resource that came right from this book! A photocopy of the last page which is a picture glossary of the dinosaurs in the book. Looking at that (and practicing on it if needed) they drew their dinosaur using shapes on a 6X9 piece of paper and selected a color tempera paint to fill it in with.

 Day 2: Read another one of Most's dinosaur books called "How Big Were the Dinosaurs?". This one is quite a bit longer but really engaging the way he compares sizes.


After reading the book, I showed them my demo of drawing the city and we talked about all the types of details they could add to make them REALLY look like a city and then they got busy drawing. They drew directly with sharpie. When their city was done they added more details to, and cut out, their dinosaur and glued it to their city.


These would have been perfect to have students record some type of audio with and add a QR code when displayed. NEXT TIME!