Pages

Showing posts with label Trees. Show all posts

Saturday, April 9, 2016

Adaptive Art Winter Art!

Well we got snow yesterday in Wisconsin, so precipitation speaking it is still winter. If it makes you feel better we actually made these throughout December and January....

 My high school adaptive art students vary quite a bit in ability and all ended up being successful with these projects...

Trees: This project I did with my Kinders and 1st graders and you can read about it here.

Mittens: Using a tracer they drew the mittens and then cut tissue paper and collaged it on with watered down glue. The backgrounds were painted paper with a finishing touch of white sponge painting.
They LOVED making these snowmen. We made the balls with newspaper and masking tape then attached popsicle sticks on the bottoms so they wouldn't topple over. For paper mache we used newspaper strips and only the best supply ever for paper mache...Elmer's Paper Mache Art Paste!
Elmer's Non-Toxic Washable Art Paste, 2 oz
I only see these students for about 40 mins 3 times a week so we took 2 classes for paper mache, one for painting, and part of one for making them into real snowmen with buttons and other embellishments.

Monday, April 4, 2016

Winter Forests with K & 1 (2015)

With winter hopefully over here in Wisconsin (you just never know!) it is about time I share the winter inspired projects I did with my kiddos...

This project was inspired by this post via pinterest which was pretty minimal so I look things into my own hands!

I Can statement: I can tell you what a landscape is. I can show trees up close and far away using size and placement.

Day 1: Texture review, creating painted paper

We kicked off the day reading Snow Party by Harriet Ziefert and then reviewed what texture was. I also started to introduce landscapes.


After our book and our chat they got busy making 12x18 pieces of green painted paper with lots of tree textures.

Day 2: Talking about landscapes, Painting the background

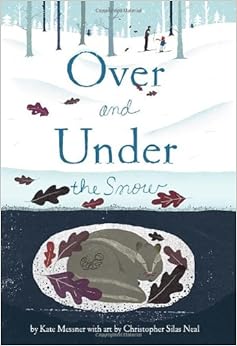
We read another BEAUTIFUL book called Over and Under the Snow by Kate Messner and then talked more about landscapes and what made something a landscape. Then they started creating a background for their forest.


I had them use a white crayon to draw their horizon line and then they sponge painted the snow with white tempera paint on a dark blue piece of 12x18 construction paper. When they finished the ground, I had a station set up to splatter paint the snow in the sky. If they were goofing around or getting paint on their faces on purpose during the splatter painting they were cut off. I used watered down tempera and big #12 watercolor brushes for the splatter. I use the technique where you get the brush nice and sloppy wet and hold it with one hand and then tap it with your other hand over the paper.

Day 3: Learning about size and placement, activity, and adding trees!

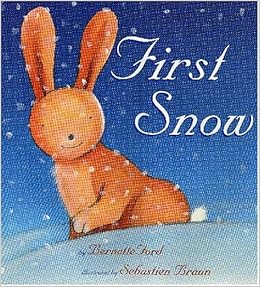
We read the book First Snow by Bernette Ford.


Then using the book I asked questions about why the trees were big or small in the illustrations and they gave me examples of where they see the same concept in their lives. To better understand the concept, and prepare them to add their trees to their artwork, I created a document in SMART Notebook for my SMART Board with a background very much like their paintings and variety of sized trees. They look turns coming up and placing the trees from biggest in the front to smallest on the top of the hill/horizon line. 


I 100% feel this activity helped solidify the concept and allowed for so many to be successful.

They got back their painted paper cut in 1/2 (so I have extra!) to create their trees from. They had to draw at least 3 tree triangles that were different sizes on the back. Then, they cut them out and glued them to their backgrounds to be biggest closest to smallest furthest away. They were also given strips of brown to be their tree trunks. It was fun to challenge them to make the biggest and smallest tree in their class! 

I also did this project with my Adaptive Art high schools students and it was really successful with them too!

Saturday, January 2, 2016

Fall Arm Trees with K and 1st (2015)

POST #175! WOAH.

Okay still running behind on fall project posts...again, thanks to break for me catching up!

A fall favorite and good line intro/review for my Kindergarteners and 1st Graders. I did a similar version of this project in the past but it develops and gets better each year.

I Can Statements: I Can identify different types of lines. I Can use 5 or more different lines in my tree. I Can use watercolors appropriately and correctly. I Can follow directions to print with bubble wrap and brayers.

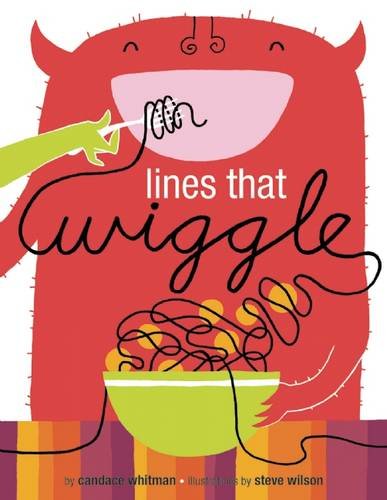
Day 1: Read "Lines that wiggle" and drew the lines in the book with our arms in the air as we read. Had them take the sheet below to their spots, I named a line and then they had to trace it before finding the same line on the floor and walking across it. I put the lines on the floor with vinyl floor tape the week before and they are still there almost 2 months later, and after many floor washings. It's good stuff!


Back to the carpet to watch the demo for tracing their arm and adding 5 or more different lines with brown oil pastel.

Day 2: I drew a picture on the SMART Board made up of all different lines and a key. Called kiddos up to find a certain line in the picture and circle it or X it. They seriously loved this. After this activity they did the watercolor on their trees and sky. 

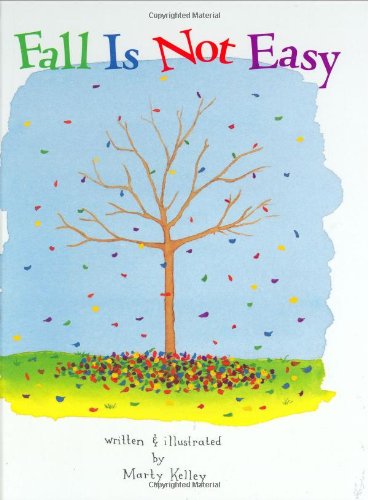
Day 3: Read a new favorite book "Fall Is Not Easy" and they watched a demo of how to use the bubble wrap to do the leaves on the tree. I had a station set up in the back of the room for this and they would put the paint on their bubble wrap there and carry it back to their spots to add it to their tree. 

Resources:


Tuesday, December 29, 2015

Holiday Art 2015

Wanted to share what my students did the few days leading up to break....
 I really like the way I managed my holiday projects this year. The last day I saw each class before break (unless they were really behind on projects) we did holiday art. Kindergarten and 1st grade did the trees and I set up 2nd through 4th so they could choose from a variety of projects.

I have been doing video demos of projects this year where I record myself ahead of time.... I didn't want to take the time to do that for these projects, butI did take pictures and showed them a step-by-step slideshow. K and 1st just saw the tree and 2nd-4th got to see the step-by-steps for each project so they could decide which ones they wanted to do. I have a really large room so it was was easy to set up each project in different sections of the room.

The tree inspiration came from this image via pinterest. I pre-cut the strips and then hid the scissors so they had to approach it like a puzzle. The bottom right was done by a 1st grade kiddo with special needs and I about cried when I saw how awesome his turned out! This was the project for K and 1st but 2nd-4th could do it as one of their choices.

The name in lights project was the definite favorite. This one also took the longest depending on how many lights they drew. Everything in black is draw with sharpie and then the lights in washable markers. A little water with a paint brush over the top of the markers and it looks like they are glowing. Too much water was an issue for a lot of kiddos who didn't seem to hear the warning about too much water and the water dripped all over the page and took the marker with it. I cannot for the life of me find the Pin on pinterest that inspired this project.

 Paper quilling is seriously one of my favorite forms of art. I wish I would have taken more pictures of these! I started with them using a heavier paper (80lb) and the paper was not holding great, so I switched to a 50lb and the results were much better. The students that chose to do this were VERY into it.

I did a little quilling of my own during one of my really well behaved classes and turned it into an ornament!

I had a group of 3rd grade boys that asked to do legos for a majority of the time and I agreed only if they built whatever I challenged them to build. This was the Santa challenge. I am blown away what kids can do with legos. Anyone who says legos don't belong in an art room needs to reconsider!

These are the ornaments that the other two elementary art teachers that I am SO blessed to work with made for me this year!

And my hand-made ornament for family and friends this year!

Hope you have time to get a little creative yourselves this break, even if it's a new adult coloring book you got as a gift! I got 3!

Sunday, December 6, 2015

Adaptive Art: Fall Projects Wrap Up

Now that Fall is officially over here in Wisconsin, here is a wrap up of the fall projects I did with my group of High School Adaptive Art Students...

 These were created with one of my favorite kinds of brushes to use to get texture, especially with this group of students...

Find them here from Roylco via School Specialty
We used oil pastels for the trunks. Thinking the trunks should have been thicker or maybe paint. I would possibly do this with Kindergarten or First grade for a one day project and maybe adding more to the background...inspiration came from this image only post via pinterest

 This is a project that has transformed from one I did last year with my Kindergarten and First Graders that you can see the original post from here. However, these ones are a billion times cooler with the bubble wrap printed leaves instead of the paper ones. I do also really enjoy the grass added to the bottom. I had my Ks and 1sts do them this year too but forgot about the green! Stay tuned for that post.

 Another repeat from a project I did with Ks and 1sts back in 2013. See the original project post here. Didn't make any changes except for not including the wind.

 A super quick (30 minutes or less) but fun activity we did. I created tracers of pumpkins and leaves and they cut and did texture rubbings on them. Inspiration came from pinterest via this post.
 
We used texture plates similar to these.

 This was an incredibly fun one. We created painted paper (front and back) and used a variety of brushes and bubble wrap of different sizes for the leaves and then painted the tube roughly with brown for the trunk. The next class we cut out cloud like shapes from the painted paper and inserted them into slits I cut in the tubes. Inspired by this post via pinterest.

This was the first real flop I have had with this group....The picture on the left was from the pin on pinterest via this artsonia post...and the two on the right are the best two from my group. Either I didn't do enough modeling or this was just too much for them. Might try again next year in a simpler way.

And last but not least, one of my favorites.... We had talked a lot at this point about leaves changing colors and how and why and this was a really fun visual representation of that. I had a leaf tracer for them and then we used oil pastels to color and try to blend to get the transitions of changing. I thought this one was also Pinterest inspired but I cannot seem to find the pin. Maybe it was my idea!

I'm still learning with this group and 3 days a week for 45 minutes is a lot of time and lesson planning but it is teaching me so much and it is such a relaxing part of my day that I really cherish!

Saturday, June 27, 2015

Spring Trees

Educator Effectiveness took the education world by storm this year in Wisconsin. After a lot of thought on what to do my Student Learning Objective (SLO) on I came up with doing something project based. I decided to work with my second graders on developing the skill of drawing trees more realistically. Our first project that I used for measuring my goal was this one that we created in the fall. In order to see how their skills improved after re-teaching and student led teaching we did a second project this spring.

I Can Statement: I can draw a tree more realistically and use materials in a different way.

Day 1: I introduced the project by talking about how we were going to do a similar project that we did earlier in the year but change how we use the materials. I was really nervous at this point that they were going to be mad that they were doing another tree but the were VERY excited. My thoughts are because of the method of drawing them that I taught them, they didn't mind. It is very fun and almost everyone is successful (see the first link for an explanation of the method).When it was time to review how to draw them I went out on a limb and had a student show it on the document camera. Man am I glad I did, it was awesome. They started with a quick practice sketch to make sure they remembered the process and then got to work.

Day 2: Before they got to work by continuing to draw and color we talked about the two other materials that we were going to use in different ways. We used watered down tempera paint and a thick dry bristly brush and did some dry brush work for the green of the tree and then for the flowers crumpled up tissue paper. The big reminders were color schemes, less is more, and think about it logically when you are adding the green to the tree. Would there be green on the trunk? In the air?

This part of the project didn't take a whole lot of time so when they finished we did a great one class/take it with you extension project that you can see here!

Love these, they are just beautiful!


Wednesday, May 27, 2015

Klimt's Tree of Life with 6th Grade

I attempted to give my older students more choice this year by doing more open-ended/prompt-like projects. This project was my first attempt with with my sixth grade students and I am pretty happy with the way it turned out!

My inspiration for this project came from this pin on pinterest via Artsonia and wanting to do an art history piece as well. Eventually my brain took me to Klimt's The Tree of Life.


I Can Statements:
I Can create a “Tree of Life” that reflects my knowledge, intuition, and experiences (WI L.4.1)
I Can: Demonstrate openness in trying new materials in making works of art. (Nat VA:Cr2.1.6a)

Day 1: We looked at Klimt's piece and did some fun fact background info about Klimt and I showed them this awesome article about the Google Doodle in honor of Klmit!


Then we started exploring "Trees of Life" from other cultures and what they meant to other cultures...

After doing some research on my own...I found this really great passage from a group that does...lets call it...spiritual classes...that really summed up my research well that I shared with students...
“The Tree of Life is a universal symbol found in many spiritual and mythological traditions around the world. In various cultures it is known as the Cosmic Tree, the World Tree and the Holy Tree. The Tree of Life symbolizes many things, including wisdom, protection, strength, bounty, beauty, and redemption”
I shared with them examples of all these different types from different cultures and then prompted them with this question... In each culture the Tree of Life or World Tree meant or did something different for it’s people. What would your tree do for you?

Here is a look at our planning sheet..
Day 2:
I did a short check in with each student before they started on their project. We talked about materials choice and how to make the purpose clear. I warned them they would be doing an artist statement so they would have to talk about any decisions they were making during the creation and why they chose the subject matter that they did.

Day 3 & 4: Solid work time!

Day 5 & 6: 
This was their first time doing artist statements so we talked about what they were and the purpose of them and I gave them this planning sheet....
I really loved this artist statement from a sixth grader whom I will really miss!

The biggest (and really only issue) came at the end of the project when some students realized they just created a tree of their hobbies and favorite things rather than a tree with a "purpose". I really loved reading their artist statements and reading how they saw the work they had done and what they were trying to communicate in their work. I could tell so many more were invested in their work than a project that gave them limited choices and strict guidelines. 


Click on this last set of pictures and take a closer look at the one on the left, you will not be disappointed. 
UPDATE!
A great resource was recently brought to my attention... for more information on Klimt and to view more of his works visit Klimt's page at Artsy.net!


Monday, December 1, 2014

Fall Arm Trees

Fall is officially over in Wisconsin but it still decorates the halls in my two buildings!


I was really excited to try my own version of this project I found on Pinterest here via Georgetown Elementary Art Blog. I wanted to stick with the original idea of types of lines but because I knew I wanted to do it with Kindergarten I changed the types of lines to just the tree and the materials to oil pastels and watercolors for their first watercolor resist artwork (my favorite!).

I Can statement: I can draw different types of lines

Day 1: We started the lesson with a book about fall. I really didn't like the one I used (frankly it was a last minute find) so I don't even remember the title. I am on the lookout for a great book about fall thats a quick read for Kinders that show a lot of trees. Then we looked at close up pictures of trees via one of my quick reference PDFs...

We talked about all the lines they saw in the bark and what the names of some of those lines might be. Before they started their own trees with lines we practiced naming and drawing them by tracing them in different colors on this sheet... (made on my iPad could be done in a basic drawing app I used Brushes)

The last step for Day 1 was tracing their hands and filling them with the different lines and going over them with oil pastels. This was the first time using oil pastels for many of them!

Day 2: Watched the leaves changing time lapse I used in many of the other classes for their fall project...

After the video, I did a demo of what happens when watercolor goes over the top of oil pastel. MINDS BLOWN. And what would happen if the blue and brown mixed if they didn't take their time and stay away from the brown while it dried. The rest of the time they painted, again a first time with watercolors for many!

Day 3: A little time at the end of the next class was used to cut leaves and add them to the now dry trees.

I love watching Kinders use something they never have before they get so darn excited!

Jefferson Elementary...hung with second grade project...


McDill Elementary...Hung with second grade project and this third grade project...


So anyone have ideas on a great fall book for Kindergarten? Specifically about trees/leaves? Not a big fan of Louis Elhert's writing (doesn't flow enough for me) but love the pictures...