Pages

Monday, September 25, 2017

Collaborative Dot Paintings

FINALLY did a dot project and finished it in time for Dot Day! I've wanted to do one the last few years but just never jumped on it or was inspired by something else first. This year, right before the start of the year a post on the Art Teacher facebook page caught my eye and I ran with it! This was the post by Art Educator Nichole Sitler Gates on the Art Teacher Facebook group that inspired our paintings:
I've got to give her credit because I ran it the same way based on what I saw in her pictures. Each table had a big sheet of bulletin board paper as well as a tray of paint cups with equal number of brushes so we didn't need to wash. Classes earlier in the day laid the base for classes that came after and when one paper was full I laid out another. So they started looking like the one below...

And ended up looking like this when all finished and hung together in the hallway! There are about 10 more not pictured because we ended up with so many! Very thankful for our giant empty hallway by the front of the building....

Here are some close ups.


With Kindergarten in the middle of the day, I was a little nervous about letting them paint for the first time EVER on these already started dot paintings. So instead they painted on 24x36 papers (two at a table) and I turned those paintings into the lettering. I also put out less paint to keep the stimuli a little lower for their eagar hands.


I've gotten so many comments and compliments from students and staff about how much they brighten our school and I cannot wait to look at them all year!


Sunday, September 17, 2017

Back in Action!

I've been MIA on the blog since February (sorry 'bout that). I instagram daily by the same name-- follow me on the sidebar of my blog or search TheArtsyFartsyArtRoom on Instagram.

I wanted to kick the new school year off on the blog with a look into my room and some new things I am trying this year as well as a re-vamp of some others!

Welcome to the Art Room at Yahara Elementary (K-4) in DeForest, Wisconsin!
I am so grateful to have such an incredible space for my students. A spot to gather, two large sinks, technology, plenty of space to work, and storage! 
 
I am even lucky enough to have my own little nook where students are restricted from. I also got rid of my big clunky desk (that I never sat at) to open up more space for early finishers and to add a book rack for the kids.

This is will be my third year in the district and I am always inspired by other art educators to try new things with my students. So here is a look into some of the new and revamped old things happening in my room this year.

Traveling Classroom Sketchbooks

This idea came to me from a classroom teacher in my building. Her daughter attends elementary school in the McFarland School District with art teacher Bonnie Tuttle. Thank you Bonnie for this awesome idea!

When it was her daughter's turn with the sketchbook she was so excited that she brought it to school and showed it to me. I knew I had to do it! I took some quick pictures of the sketchbook and worked from there to put together my own system for our school.

Below is what is attached to the inside front covers for families and each time a student takes it home I put a label with their name on their pages they can use and the date it needs to come back to school.
I started these with 1st-4th the second time they came to art this year. I tried choosing responsible students from each class to take it home but I have had two students already forget it. Hopefully there is enough days of art and it won't happen very often and everyone will get a turn. I am contemplating sending out a parent e-mail so they can be more aware of it when it comes home with their student.

I made it a point to communicate with classroom teachers that I was doing this so they can encourage the responsibility of it and let me know of students that may have an issue with getting it back to school. I also communicated with students that it doesn't have to be done at home either, they could do it with after school care, another teacher, or our principal.

I save about 3 minutes after clean up for the artist to sit on my teacher stool and share what they did in the sketchbook. They they are not talking much, I prompt them with questions about materials and inspiration sources.

Mindfulness

Our district and the surrounding Madison area are doing a lot of work with mindfulness in the schools. UW Madison in particular does a lot of research on Mindfulness and it is trickling into the  entire public school system in the area. Training for staff and working in the classroom with students is on the rise and it is pretty incredible.

Last year I dabbled in mindfulness with a bell at the start of class and a deep breath followed by us reading together...

"Artists are kind with our bodies, Artists are kind with our words, Artists are kind with our minds, Artists are kind with our hands"

Image result for imaginations fun relaxationI saw a poster similar to the one I created a above and started to rethink our start of class. I still ring the bell but now just ask students to listen to me read the poster and do the deep slow breath.

We also have this bizarre extra time built into our schedules every day called Plus Time where every grade gets two extra specials during our 12 day rotation BUT we can't do curriculum with them during that time.

At a mindfulness training I took over the summer I got my hands on this incredible book and it inspired an awesome idea. During that plus time with 1st-4th I have them participate in mindful visualizations and drawings. I find some sort of youtube visual that goes with the visualization I am reading for those kiddos that can't just lay there and need something a little more to focus on.  It is going off incredible and I can't wait to share the art coming out of it on a later post. For the time being, I do not do it with Kindergarten but probably will start to mid-year.

I purchased the first book from this series, there are two more that my other elementary art team members purchased. You can find them all on amazon.


Look What We Learned Board

I started a "Look What We Learned" board outside of the art room. I believe this idea came from the ever incredible Cassie Stephens. The way I presented this to my students was a place to share their "Aha!" moments and things they were really proud of in the art room. I think as long as I am reminding and encouraging students they can add to it, I think it will get used on a regular basis. Two weeks in, and there is already a handful up on the board (this was taken before school started).
I keep a stack of post-its on a small table inside my classroom and they can add to it after showing me what they wrote during any work time. 

Hello!

"Hello my wonderful artists!"
"Hello my wonderful art teacher!"
"How are you today?"
"Ready to create!"

Sound familiar? This new greeting I do with my students when they come into the room and get seated on the carpet-- I can also thank Cassie Stephens for. The kids match my voice and it lets them say something and be loud before we settle in with the mindfulness bell. It has been working AWESOME. 

Stay tuned for more inside my art room and be sure to follow on instagram for daily updates!


Monday, February 13, 2017

Winter Shape Architecture (2016)

Focusing on shapes while teaching architecture to K&1 seem to be a perfect fit. Around Christmas and during winter adds a whole other creative layer for students!
I Can identify the shapes in my artwork.
I Can tell you what an architect does.

Day 1: Intro to Architecture and Building
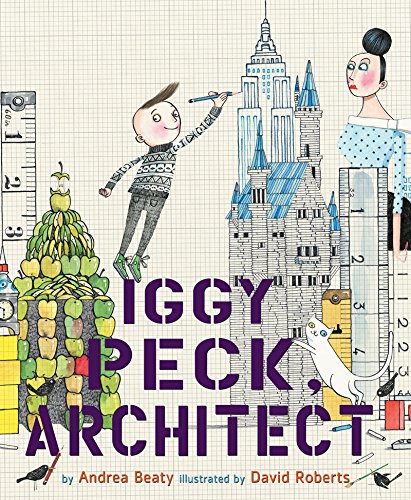
If you want a great story for introducing architecture read Iggy Peck, Architect by Andrea Beaty it is easy to understand and just the right amount of silly.
I started our lesson with that story and then had them watch this StoryBots video to reinforce.
We talked about all the different kinds of buildings they saw in the book and video and afterwards I had them think-pair-share about what they were going to build using shapes. We did this before they saw my example and my demo video so they wouldn't be set on building a house like mine. 
Because identifying and not creating the shapes was the goal of the lesson I provided cardboard tracers of the basic shapes in all different sizes. If they wanted to draw shapes other than those basic ones they were encouraged to do so. They used glue sponges to assemble their buildings.
Day 2: Shape Graphing and Details.
To put the focus back on the shapes, we started this second day with the book Shape Shift by Joyce Hesselberth.
Then using my artwork as an example, together we graphed out on a basic bar graph, the shapes I used to build with.
They were then asked to do the same with their artwork. We did this before adding details with construction paper crayons to avoid the confusion of graphing any shapes they might draw. They could have included those shapes when graphing, but I wanted to keep it consistent and make sure I knew what they were looking at when I graded.
After they finished graphing we met back on the carpet and they watched my demo of adding details with construction paper crayons and brainstormed all the different details they could add. It was close to Christmas when we worked on these so there was a lot of Christmas related ideas. Pokemon is the big thing right now so that inspired a lot of kiddos too. Some decided on a combo of both!
Day 3: Snow and Architecture Centers.
To wrap up this lesson and unit we started with the book Snow by Uri Shulevitz. It has great pictures of a city (architecture!) during a snowfall which was perfect segway into the snow part of the project.
They watched my demo video of adding snow with a small paintbrush and Q-tips and were sent to explore the different architecture centers I had set up for them. Many were building toys like blocks, legos, straws and connectors, and also coloring sheets of different types of buildings. While they were exploring the centers I called them back in small groups to add snow if they wanted to add it. They did not have to.

Just LOVE this lesson and how they put all their awesome individual ideas into them. They are now on display at our district office because I loved them so much :)
                        

Sunday, February 5, 2017

Color Mixing Cookies

 Back in December I posted about how I was incorporating more play into my art room especially with K and 1 students, you can read it here.  This lesson with K&1 was another where I loaded on the play. So much so, my students thought I was crazy.
I Can mix primary colors to get secondary colors.
I Can identify primary colors.

Day 1: Baking Cookies
If you aren't ready to make a fool out of yourself then you might not be ready for this. Let me set the stage...Before my students came in, I took flour I brought from home and put smudges of it all over me. As they walked in the room, I had a picture of a kitchen on the SMART board and had an empty mixing bowl that I was stirring with a spatula. Behind me "in my kitchen", a toy oven borrowed from a Kindergarten room. We didn't start with our regular routine as I was too busy mixing my cookies. They thought I was bonkers but the laugher and excitement was contagious.

Once the initial shock was over and they settled, I asked each student to go their table spot with a real rolling pin (that we use for clay) and wait for me to bring them dough. This dough was totally imaginary that I plopped in front of them out of my big mixing bowl. As they were rolling out the imaginary dough, I quickly had their dough "appear" by putting a piece of heavy weight manilla tag at their spot as if the dough became visible when rolled flat.
At this time I fessed up that we were pretending and they came up to the carpet to watch my demo of tracing cookie cutters and cutting them out. Cookie cutters can be a bit tough to trace so I put emphasis on the idea that cookies in real life don't turn out perfect either. This alleviated some of the pressure. And, I told them they didn't need to use the cookie cutters at all if they didn't want to. They were asked to make 4 cookies to make sure they were able to do all the "frosting" next art time. They also watched my demo of decorating a plate and gluing my cookies on it. I showed them some festive plates for inspiration but encouraged them to decorate however they wanted.
When they were done tracing and cutting their cookies out they had an opportunity, if they wanted it, to "bake" their cookies in our play oven on pans I created out of cardboard and tinfoil. I really played into it by making sure they wore my oven mitts from home when taking the pans out because they were "hot". Yes, there were some students who did not want to use the oven but I would say 95% percent did and loved it.
 In my 8 total classes of K& 1 not one section asked to do free art this day.

Day 2: Frosting with Primary Colors
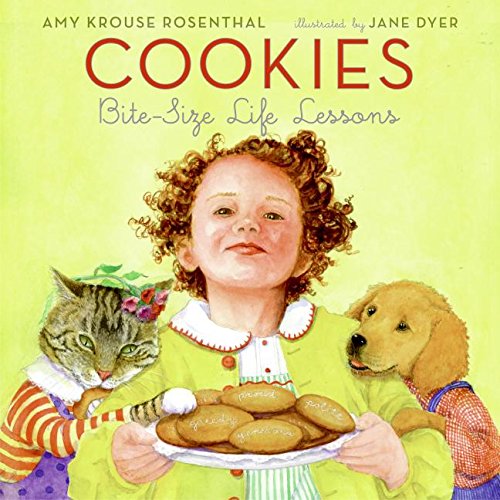
We kicked off the day by reading the beautiful story, Cookies: Bite-Size Life Lessons written by Amy Krouse Rosenthal.

Then we got to talking about the color wheel and primary colors and I used these two videos to help out the lesson. The favorite OK GO's Sesame Street primary colors song...
And this claymation (with the sound turned down-not great music) to predict the mixing...
When it was time to paint, to help with the success of the color mixing I printed 24 of the document below in color and had them laminated. Students did their color mixing right on these papers, I did one mix at a time going around the room squeezing out the colors onto their papers. They were asked to use each of their new colors on their cookies and to experiment with the paint for whatever cookies they had left. When they finished they gave the sheets a "shower" (under the running water) in the sink--not a "bath" (submerged) or the sheets don't last as long. The sheets made it through all 8 classes. You would have to reprint and laminate each year but its worth it, they really worked.


Now we did this project/lesson as if they were Christmas cookies but there is no reason you couldn't do it for any other time of year and just switch cookie cutters or do without the cutters. Valentine's Day would be fun!

Monday, January 16, 2017

Australian Aboriginal Dot Art (2016)

This project was a total hit last year so I used it again with 3rd grade. Check out the original post with lesson break down here.
 The only thing I changed was paint distribution. I have 3oz cups with lids and I put one of each color on a tray and a stick for dotting with each. Each table got one tray and it really kept paint from being wasted and DRAMATICALLY helped with cleanup. No washing paint palettes like last year!
Once again, this project was a hit and turned out just beautiful!