
Thank you for your email and the link to your blog . I love the day by day break down and the fact that you used sharpies : ) the pieces look amazing . It's always cool to see how these sorts of projects come together . Their color selections and compositions are really cool !! It's really kind of you to share this with me . Please share with the kids that I'm impressed with heir final pieces and please don't hesitate if there are questions I can answer
Thank you again
James
When I saw this post over at Shine Brite Zamorano I was so inspired by contemporary artist James Marshall (aka Dalek) and the work the students did based on his art! I knew I had to do my own version with my students...

I can statement: I can use line and color like the contemporary artist Dalek in my artwork.
Day 1: Started off the project with a little background of Marshall and the transformation in his artwork from his space monkey character to his current work. Warning! Make sure you look carefully at his space monkey work before showing students....a lot of them are featuring him stabbing or in other "bad choice" situations as I share with my students.

We also watched a great YouTube video of Dalek working on a mural in Colorado which provided a great platform of discussion about whose artwork it is if others help.
After the mural discussion, we took quite a bit of time exploring his newer artwork and came up with a very impressive list of qualities in his work. I wish I would have taken a picture of the board with their ideas! I was so impressed with the way they spoke about his art and the vocabulary they were using!
 |
| James Marshall (a.k.a. Dalek) |
They all started their pieces with me with a few required lines. I had them do one vertical, one horizontal, and one diagonal to make sure they had a good space to start with. Before I sent them off on their own, I demoed a few of the more intricate drawings they could do but were not required to do. They spent the rest of the time drawing. Any circles were created by tracing lids and all lines with rulers.
Day 2: Now let me tell you how wonderful my PTO is! Each year I get some funds to use on whatever I want for my classroom and this year I decided to buy large packs of multicolored sharpies that were CRAZY on sale at staples. Like $9 on sale. I knew they needed to be used on this project!
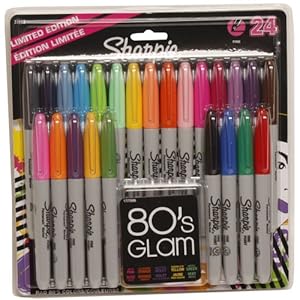
When students were ready to color on the second day I made a huge deal out of these sharpies. We talked about how only 4th-6th graders were going to be allowed to use them and the best way to color with them to keep the tips sharp. I was so pleased with how well students took care of the markers! They might even last to do this project again next year!

I think sharpies were a great choice in material because looking at his work the solidness of the colors really added such a striking visual quality. And it did to their work too, even when their design was lacking.
LOOK AT THIS COLOR (and design)!

Days 3-5: Work days! Each day we reviewed how he used color in his work as reminders about how to use it in theirs and not just get excited about all the colors they had to choose from. Even though the final artworks were only 9x9 it took them quite awhile to finish but I was more than okay with that because I knew it meant a higher quality of work!
Jefferson Elementary...


McDill Elementary...


YES! They came out so sharp! Good choice with the markers. You should share this with James. He's very supportive of art ed and the students' work:)
ReplyDeleteThanks! Took your advice and shared with him via the contact section on his website. We will see if I hear from him!
Delete