Holidays are my favorite way to play catch up with classes that are behind on projects for one reason or another....and I also LOVE excuses to dress thematically.
That would be me making the tongue sticking out--winky face. Does anyone else work with awesome people!?
Enjoy these awesome pumpkins created by Kindergarten through 4th grade students!
This one was inspired by the awesome old school Disney animation I showed 1st-4th at the start of class! Check out the Disney animation "Silly Symphonies: Skeleton Dance" below!
Sorry I've been missing since mid-August but it's been a very busy start of the year and I have a lot of exciting things to start sharing again!
This project has been floating all over the internet and I was finally inspired to do it myself after this post and this post from Cassie Stephens! Love LOVE LOOOOOVVVVEEE the way it turned out!
This was the perfect way to kick off the year and get almost all 400ish students busy making art on the first day.
I Can draw a self-portrait and color it using one color to make a collaborative artwork.
Day 1:
1st grade through 4th grade started their first day of art with the art room scavenger hunt you see below... I got the idea from an instagram post but I just can't seem to find it again to give the credit this idea deserves! I had students work in teams and I helped read when needed. They went to the location in the room that matched the circle and found a color there. They filled in the circle on their sheet with the color they found. It was a great refresher for everyone and perfect for new students.
After they finished the scavenger hunt I talked about the art piece they were going to create collaboratively showing them an example of another completed one so they understood why they were just using one color. I showed them my demo video of me drawing and then they got busy. I gave them white 4x4 squares, cartooning sheets to look at for inspiration, and a black felt tip pen to draw with.
Kindergarten spent Day 1 hearing the book Art Today! (HIGHLY recommend for the first day for Kinders), going on a tour of the art room, and drawing me anything they wanted so I could get a skills intake.
Day 2:
Each table got a box of art supplies in their color only. This was SO worth taking the time to do. In the box there was colored pencils, regular crayons as well as glitter, metallic, and construction paper crayons, skinny markers, fat markers, fluorescent markers, and sharpies. They could use any material anywhere with the exception of marker on their face so it wouldn't cover their features. They also had to color the entire square.
It didn't take the entire time for them to finish but I anticipated that so they could have time to explore new items in the art room.
After seeing Cassie's final product, if I do this again I will think of a different way to assemble or go BIGGER for a bigger impact on the walls. It was so fun watching students search for theirs!
This project (inspired by Art with Mr. E's) is officially one of my new favorites for K&1. It was a great review for lines and a super fun exploration of materials!
I Can identify different types of lines.
I Can explore many different materials.
Day 1: Reviewing lines. Line paintings.
Lines are one of the first things we visit in the year so I love doing a refresher project on them at the end of the year. To kick this project off I drew a picture on the SMART Board that contained all the lines they learned previously and they took turns coming up and finding them. Then we did some whole body fun by having groups of students make the different types of lines with their bodies! Just an observation: my classes that were most behaviorally challenging ended up doing the best with this activity.
Dashed and Zig-Zag
Castle and Thick Line
After these activities they went to their seats and drew each type of line with a sharpie. Then they got to explore their first new material--metallic watercolors. Not really a "new" material as far as watercolors go but still VERY exciting for them to see sparkles and shine! I really encouraged them to have their colors touch but it was a little hard of a concept because many just tried to follow the line and not make the bands of color. I also had a glitter tempera paint station set up for them to add MORE sparkles if they wanted. Obviously they wanted it.
Day 2: Building Rocket Ships. Assessment.
Tracers. I always go back and forth on using them or not. But, an old principle (and art department head) once told me that as long as the learning goal isn't creating that specific shape they are ok. So, that's what I did. Each part of the rocket ship had a tracer: the main body, the wings, and the booster. After they watched my demo video on using the tracers and gluing the pieces together I let them run wild with a huge variety of papers with different textures and patterns. This was our second material that they explored.
Because the process of building the rockets was very independent, I used this time to pull students over to me for a verbal assessment to identify the different types of line. I had the lines drawn on a piece of paper and they went through and named as many as possible. Each student took about 30 seconds or less which made a very quick and easy assessment. The one little bump was a student would come over to ask me something while I was assessing another and they would spit out the answer before the kiddo getting assessed could answer.
Day 3: Adding the rocket streams and backgrounds.
We started the day talking about creating the rocket stream out of their line paintings. Again they watched my demo video and brainstormed the different shapes the stream could be and how it was okay if we cut some of our lines off. Then they added their rocketship to black paper and added some amazing details with our last material exploration -- metallic markers. I pre-punched stars on metallic paper that they could add as well and more tempera glitter paint. One last option for them was adding an astronaut. Again, I provided a tracer. The success rate overall on this project was so high and each was its own beautiful individual work of art with so much personality showing through.
Below are detail pictures...I was so blown away by some of these kiddos!!!!
If you havn't seen Art with Mrs.Nguyens posts on these babies (this is just one of her many posts on it) then you have been seriously missing out. Her TpT lesson for these is worth every penny and worked perfectly for my 4th graders. I did change up the powerpoint a bit to fit my style but other than that I used all of her resources, including the video teaching the folds.
I Can create a relief sculpture using paper that has radial symmetry.
I Can use color in an organized way.
Before you do anything to start this project, cut about a billion* pieces of 3x3 construction paper in all different colors. After cutting I divided up into ice cream buckets, one for each table.
*There is really no way to know how much of what colors they will use. I started with 4 pieces of 12x18 construction paper of every color that I had and cut more as they used them.
Day 1: Learning and practicing radial symmetry.
Using the awesome powerpoint by Mrs. Nguyen and modified by me, I introduced radial symmetry to my students and then we spent the rest of class with my buckets of "junk" making radial symmetry on big 24x24 sheets of paper. The paper has basic radial symmetry guidelines drawn on them and students work in table teams to create the most interesting radial symmetry.
My only warning with this is sometimes they get carried away with the "junk" and start getting in fights about what table has what and who can borrow and who can't. Squash it fast.
Day 2: Review radial symmetry and learn the folds. Talk about organized color.
After a review of radial symmetry I show them the handouts that teach the folds and we watch the video of learning the folds (both by Mrs. Nguyen) together. Then they grab one piece of 3x3 paper for each fold and go back to their seats. We watch the video again, pausing where needed to follow along making the folds. This process worked really well because those that got it right away kept going and those that didn't followed slowly with the video.
After we finished all the folds they went nuts folding whatever they wanted to use for their project and put them in a big envelope with their name on it for next class. Students that had more difficulty with the folds met me at the carpet and we went through the video again (maybe 1 or 2 kiddos per class). A little ways through I brought them all back up front to talk about our I Can statement of using color in an organized way. They had a choice of either using color symmetrically or using patterns and balance with color. I showed a lot of examples from Mrs. Nguyen's powerpoint.
Day 2: Another review, folding the background.
We reviewed radial symmetry again by looking at a variety of pictures and they had to use plickers to tell me if the image had radial symmetry or not. Check out the video below to see how plickers works. Its seriously the best. AND FREE. AND students LOVE it.
After that they grabbed the black paper (12x12 square) and we walked through the folds together as a class to get the folded guidelines for their paper relief sculptures.
At this point the workflow became different for different students. Some wanted to fold everything before gluing and some folded and glued at the same time. It didn't matter to me as long as I could see them making smart choices in their art.
I highly recommend using glue sponges for this project. It allowed for such clean and beautiful work. We used popsicle sticks to rub down the paper that was in a tight space if their fingers wouldn't fit.
Days 3-6: Workdays and extensions.
Give them a lot of time on these, it is so very worth it and hopefully they will love this project as much as mine did. Towards the end when some were finished and some weren't, I had two follow up activities they could do. Make a radial symmetry drawing out of their favorite things, or make a group radial symmetry paper relief sculpture on 24X24 paper.
There was so many great birdhouse lessons floating around Pinterest this year that I was inspired to try a version of my own. Just to name a few, inspiration came from these posts from these blogs: For the Love of Art, Kids Artsits, Art with Mrs. Nguyen, and Painted Paper Art.
I Can Statements:
I Can create a birdhouse using 5 or more shapes.
I Can identify the shapes I use in my birdhouse.
Day 1: Painted Paper!
I recently just got to the painted paper party so we had to take an incredibly fun week in Kindergarten and First to make a lot of painted paper. Each day in the rotation was in charge of one color. Each student got to make a 18x24 piece of paper that got cut down into 4 smaller ones when dried.
Day 2: Birds!
They did a bird draw along with me straight with sharpie. While drawing, we talked about all the ways they could make them different and give them different personalities even though they were all following the same basic drawing. For painting, they used smaller brushes and all colors were made available. I wasn't planning on the birds being more than three colors, the plan was body one color, wings and tail another color. However, I forgot to say that and it naturally took off to paint them in any way possible! Some ended up with stripes, some with polka dots, and some with every color. They turned out more beautiful than I imagined, after all, this year was really about letting go and this proved to me the magic that happens when I do.
Day 3: Assemble the houses!
At the start of this class we had a really great time looking at a LOT of different birdhouses. I tried to find the greatest variety of colors, sizes, shapes, designs, and themes and after looking at the images we made a list of what a bird house had to have.
Here is what they came up with:
1. Hole for the birds to get in
2. Roof
3. Main house
4. Walls
We also came to the really excited conclusion that they could look like ANYTHING!
After this amazing discussion took place I talked about creating our bird houses using shapes and all the shapes they know and can use. Then they watched my demo video of constructing my house. The big take away of the demo video was drawing on the white side of the paper. I did provide circle tracers but all the rest of the shapes were drawn free hand.
(Assembled birdhouses without oil pastels or birds)
Day 4: Put a bird on it!
On this last day we started with a brief shape assessment, I handed back houses and gave them the assessment you see below and they counted up their shapes, wrote them down, and handed it back to me with their name on it.
After we got that out of the way it became the best day ever! They got their birds back, still on the white paper, and they watched my demo of decorating my house and adding my birds. I highly encouraged them to use all the lines we focused on a bunch throughout the year as well as patterns and themes. All the decorating was done with oil pastels and black sharpies. I did put the paper back out this day for them to add more shapes if they needed/wanted to add more.
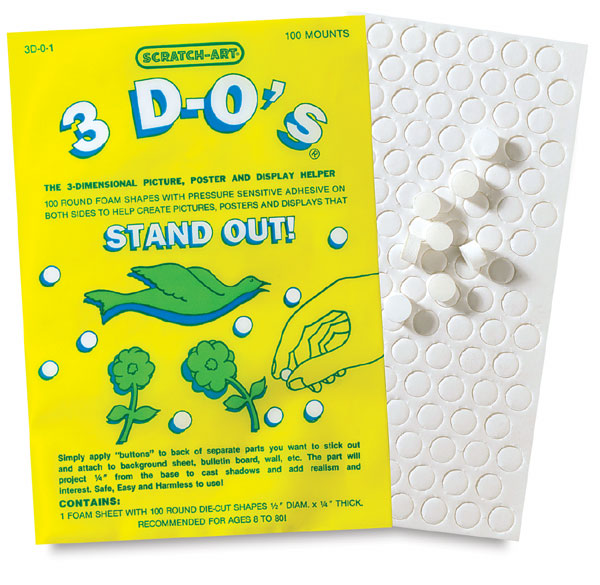
My favorite part was them attaching their birds. Most kiddos painted two birds so I gave them the option of using both or just one. They attached them using one of the coolest art supplies ever--3D-Os. Sold here by Dick Blick or School Specialty. They are a foam circle with adhesive on both sides, they give a subtle 3D effect by hovering about a 1/4 inch off the paper.
In the bottom left birdhouse above the student accidentally cut off the bird's legs and this was his problem solving solution! YES!
Bottom right and top above, Lots of "love birds" appeared in first grade...
This lesson/project was SO FUN and colorful and the students loved it as well.
A seriously silly and fun activity my students did at the end of the year-- I am also going to add it to my drawing activity binder for this upcoming school year.
All of my grade levels were able to do this, including Kindergarten with just a little extra step by step how-to for them.
I'm sure you have seen other versions of these "Roll-A-whatever" drawing activities, I created a blank "Roll-A" template on the computer so I can type titles and categories and then hand draw the rolls. Then I scan the finished one back into the computer and upload/print away! (My monster version was inspired by one created by Expressive Monkey)
I HIGHLY recommend investing in foam dice. Makes a world of difference!
FYI, one of my kindergarteners did the black and white drawing on top.