Pages

Thursday, June 30, 2016

Japanese Koi Fish with 3rd Grade

200th post! Woohoo!

Inspiration for this project came from this post via pinterest...


I Can statements: I Can tell you something about Japan. I Can draw and paint two or more koi fish in an environment. I Can use watercolors correctly.

As i've mentioned in other 3rd grade "travels" my goal is to give my students the biggest picture of a culture or country as I can in a one project time frame. I would love to spend months on one culture/part of the world but with our curriculum as is--this is the best way that I have found to frame the lesson. To help my students track their new found knowledge, each time we "travel" to a new place I have them fill out a passport page. You can read more about this process from this post.

Day 1: Intro to Japan, passport, and practice.

We started by looking at the Japanese flag, looking at Japan on a map, and then 5 facts about Japan!

1. Japan consists of over 3,000 islands
2. There are more pets than children in Japan (this BY FAR was their favorite fact)
3. Around 24 billion pairs of chopsticks are used in Japan each year
4. Mt. Fuji, the tallest mountain in Japan, is also an active volcano
5. Koi fish are symbols in Japanese culture for good fortune, success, courage, and perseverance. They appear often in Japanese art.

Students shared experiences where they have seen koi fish before and what they looked like and made them feel.

Then the first part of their passports were filled out and it was time to start working. I provided them with the handout I created below and they practiced 4 times (or more) drawing the fish.


 I put a really big emphasis on this sketching process because their final painting was going to be on watercolor paper and they were only going to get one piece (front and back) so they really needed to be prepared and practiced in drawing koi fish. When they had it down I gave them their piece of watercolor paper (only a few students got to this on the first day).

Day 2: Final drawings, crayon outlines.

During the next class everyone moved on to the watercolor paper and to help control their watercolors they outlined everything they drew with pencil in black or white crayon. 
I found some really great and LONG youtube videos of koi fish ponds to play during work time this day and on their painting days...they also were great inspiration for when it came time to choose colors to paint their fish.


Day 3: Painting and salt demo, painting work day!

We kicked off with a demo of painting using watercolors and how to apply salt for the best results in creating one of my favorite watercolor effects. Once students started using the salt I swear it was all over my room for the next month. I put up the image below for students to look at while deciding on colors for their fish. They were also allowed/encouraged to make up their own breed of koi fish ;)


Day 4: Last workday and wrapping up Japan passport entry.

The last full class workday was spent painting and adding tissue paper flowers.

I am SO PROUD of the quality of work that came out of my students on this project. I think I have to thank the watercolor paper for that-- which really encouraged them to focus, slow down, and take their time working.
 

Wednesday, June 22, 2016

Abstract Paintings with 4th Grade

I've been MIA for a few weeks taking a break from anything school/work related to enjoy the first few weeks of break, but now I'm back in action ready to share more projects from last year!

First up, these super fun abstract paintings I did with my 4th graders...

I Can Statements:
I Can talk about abstract art. I Can create an abstract artwork using my name. I can make shades and tints to paint monochromatically.

Day 1: Started this lesson in a really fun way with my students, I had them partner up and find a spot in the room and I put up an abstract painting or sculpture on the SMARTboard. I had given them a list of a variety things to talk/think about with their partner during this activity... "How does this make you feel?" "Do you see anything in this artwork or does it remind you of anything?" "Do you think this is art?"...and other questions that would spark the conversation. After a minute or two they changed partners and I switched the artwork. This went on for 15 minutes or so and then we came back together to talk about what we heard others say and what we thought. Eventually getting to the conclusion that we were looking at abstract art. I was also a participant in this activity with my partnering up with my students.


Because the 4th grade curriculum is centered on the 4th graders themselves, I wanted to find a way to connect back to that...ergo to set up their paintings they started by writing their names (and I don't just mean writing their names on the back to identify their work). They could write their first, middle, last or any combination of their name and they had to write it in a way that created a variety of interesting shapes and spaces that could be filled in with paint. I encouraged capital letters and stretching and rotating them to create the most interesting composition and then repeating the name over and over. Check out my demo video below (sorry no sound, I narrate live to my students).


Day 2: We reviewed abstract art and then started our discussion on value and monochromatic colors. My favorite part was showing them monochromatic photography and paintings. We got busy practicing by painting a strip of paper from light to dark of their chosen color. Once I saw the strip they were free to get busy on their final artwork. I encouraged them to mix in the best way for them (I love to do my mixing right on my paper) and made sure they knew they would be in charge of cleaning their paint pallette (which we almost never use because i'm a big fan of the disposable route).

Day 3 & 4: A lot more paint and painting.


Day 5: When a good chunk of students were done painting we did my favorite part. CUTTING!!!!!! There wasn't really any guidelines for this part of the project other than changing the edge and using every little piece of their painting, no tossing scraps! The size of the pieces that they cut was up to them. For this project, I introduced them to glue sponges which really kept these looking incredible and not full of loads and loads of glue. My helpful hint was really really really holding the pieces down after gluing. I even encouraged sitting on their artwork just to make sure they were nice and flat ;) I had them keep the monochromatic theme for their background paper but I think complementary colors for their background would be a great extra pop to these next time around.


Mixing paint always keeps students engaged and I chalked this one up to a really successful project especially during our critique where they could barely sit still and keep from coming up and pointing out all the things they "saw" in each other's paintings. One more bonus--if they get behind they can skip the cutting up part!

Monday, May 30, 2016

End of the Year Paper Sculptures

The last few weeks of the school year are in full swing. All 400ish portfolios are handed back which means one day-no grade-"Take it with you please!"-projects are happening all over the place.


THIS is my favorite. Any class that was caught up and had a day or so left with me are making these wicked awesome paper sculptures. HUGE thanks to the ever brilliant shine brite zamorano for the inspiration via this post from pinterest.

These were done with a variety of K-4 classes and were incredibly open ended. I made the video below (Sorry I don't do sound!) to show them some of the basics and just "required" them to do two pieces of paper as the base. The two paper rule was to give it a little weight so they wouldn't lift when they started gluing. Everything else they did was up to them. Most students went abstract but I had a few do playgrounds, roller coasters, houses, and masks.


The only two negatives were the prep of cutting all the paper and having K & 1-ers wanting to do the cylinder and having difficulty gluing it down with enough glue to keep it on. There was a lot of end of the world tears when that happened.


My FAVORITE thing that happened was no one asking to do free art in my 3 & 4 classes because they were so completely engaged (which says a lot for the last 3 weeks of school).


HIGHLY recommend this as an end of the year project, if you have any paper left that is!

Thursday, May 5, 2016

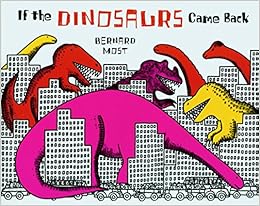
If the Dinosaurs Came Back (2015)

This is another repeat project that I did with students in my last school. You can check out the original lesson here. It's such a fun way to teach finding shapes to draw with K & 1 because DINOSAURS!


I Can draw a dinosaur using shapes
I Can draw a city with a lot of detail

Day 1: Read a book that is probably in my top 10 list of Best Books for an Elementary Art Room... "If the Dinosaurs Came Back" by Bernard Most. The way he uses colors only on the dinosaurs is my favorite part and a great conversation piece to talk about with students.


After we read the story, I had a few pictures of dinosaurs on my SMART Board and had students come up and draw the shapes they saw over the top of the dinosaurs. I 100% believe this was a part of the process that made my students successful on this project. After this practice, I gave each a fabulous resource that came right from this book! A photocopy of the last page which is a picture glossary of the dinosaurs in the book. Looking at that (and practicing on it if needed) they drew their dinosaur using shapes on a 6X9 piece of paper and selected a color tempera paint to fill it in with.

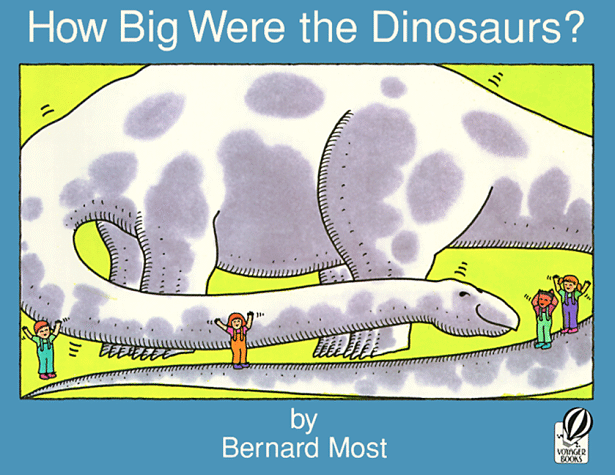
 Day 2: Read another one of Most's dinosaur books called "How Big Were the Dinosaurs?". This one is quite a bit longer but really engaging the way he compares sizes.


After reading the book, I showed them my demo of drawing the city and we talked about all the types of details they could add to make them REALLY look like a city and then they got busy drawing. They drew directly with sharpie. When their city was done they added more details to, and cut out, their dinosaur and glued it to their city.


These would have been perfect to have students record some type of audio with and add a QR code when displayed. NEXT TIME!

Tuesday, May 3, 2016

Cat in the Hats! (2015)

At the beginning of March kinders and 1st grade celebrated Dr. Seuss's birthday with a little Cat in the Hat draw along and painting. Inspiration and some of the drawing steps came from this post via Pinterest. 


 I really pushed that they could look silly and NOT perfect because Dr. Seuss would probably love that! It is a little challenging and some kiddos got frustrated easily and started over once or twice.


They used black crayons to draw and red watercolor.


While they painted and colored other Dr Seuss like things I played them these awesome read alouds of classic Dr. Seuss books... 


Saturday, April 30, 2016

Mondrian Creatures (2015)

Mondrian can be a little boring but this project always puts a fun twist on him that keeps students engaged...check out my original lesson here with links to where I got the original idea. I also did another awesome Mondrian project with my old 5th graders that you can check out here.

I Can tell you something about the artist Piet Mondrian
I Can name the primary colors
I Can create a creature out of a Mondrian inspired painting

Day 1: Intro to Mondrian including using the awesome video below....


After filling out their artist page they set up their papers so they were ready to paint next class. They each had a 9x12 piece of paper and had to draw at least 3 vertical and horizontal lines that touched each side. They also added more lines that didn't go all the way across to make for a more interesting composition. I did this with them using my document camera and we really focused on using our ruler correctly to get straight lines.

Day 2: Another AWESOME video. Review of primary colors. Then painting the primaries.

This video is probably their favorite.

For painting the primaries, I had each individual primary color of tempera paint on 2 tables and students moved to the color they needed to use. (A simple easy way to incorporate movement!)

Day 3: ANOTHER awesome video. Painting the black lines and practicing their creature.


For painting the black lines, I had multiple widths of flat brushes for them to use for more line variety. When they finished they got a 9x12 scratch paper to practice drawing whatever they were going to turn their painting into. Students that were absent somewhere in this process used a thick sharpie to draw their black lines instead of painting, this really helped to catch them up.

Day 4: ONE MORE awesome video. Creating the creature day one.

This one is MY favorite.

On the back of their paintings they drew their creature as big as possible and cut it out. I had all colored scraps, silver paper, string, and sharpies for them to add more details.

Day 5: They were bummed I didn't have one more video. A second workday to create their creature, fill out their second part of their artist page, and do the mondrian extension activity.


Anyone else have a fun project they do with Mondrian besides just the classic painting like him?

Wednesday, April 13, 2016

Big! Vertical! Snowmen! (2015)

Great news! This is the last winter project I have to share with you. Hopefully that actually means we will finally get spring around here! I created these with Kindergarten and 1st but it would be a great way to explore using paper in a 3 dimensional way with slightly older kids.


I have done this project previously and written about it here and here. But I changed it up this year with materials and adding another concept.

I Can create a vertical snowman that takes up most of my paper.
I Can add something 3D to my snowman.
I Can tell you what 3D means.

Day 1: Kicked off with one of my favorite books called Snowmen All Year (it comes from a series of other beautifully illustrated snowmen books).


Then we got into the same discussion as usual with this project about vertical vs horizontal. To reinforce, I had a variety of images and flipped through them and they had to show me with their arm if they thought the subject of the image was vertical or horizontal. This was really fun and silly. Especially because I tried to find some more creative images like this one...

After my demo video they were ready to work. They drew the snowman with a white crayon first then filled it in with white tempera.
Keep in mind these are pretty big each one is 1/3 of a piece of poster board....

Day 2: Instead of a story we watched one of my FAVORITE animations and talked about what the animation was trying to teach us...

Then we dived into talking about 2D vs 3D. Both the concept of vertical vs horizontal and 2D vs 3D is easy for the littles to understand but remembering the vocabulary always seems to stump them. After my video demo and them watching me make a cup for my snowmen only like 100 times they got to work!


Day 3: A little more work time was needed for a good chunk of students but not an entire class.

I did a little experimenting this time with giving some extra supplies like oil pastels and funky scissors to some classes but not all. If I do this project again I think I will give more choice in materials and allow for any combination of them.